Birthday Shannagins

I just finished a book called Fan Girl by Rainbow Rowell. It is about this girl named Cath, who coincidentally is a lot like me. She is entering her first year in college, along with her twin sister, Wren. Both girls are completely obsessed with a series of books that revolve around this fictional character, Simon Snow. {ie. Harry Potter in my case.}  She is so enthralled with the books, that she writes fan-fiction to keep the characters alive in their magical world of Mage and has thousands of followers waiting with baited breath for the next chapter to be released . She is otherwise known as, a complete genius and obvious introvert. {See? Just like me.} She stays up all night reading and writing in her baggy sweatpants and hair in a bun, while her twin, the more confident one, goes out to frat parties and lives the typical college life.

After I finished the book, it got me thinking. Could I write Harry Potter fan-fiction? I know it exists. I know of several forums that authors use just for the sake of Potter fan-fiction. And I have read the books so many times, that I feel like I was a part of their life, just as much as they were a part of mine. And for that matter, could I create a world like J.K. Rowling did? On paper napkins? Or even Post-its? My mom definitely thinks I can.

Maybe.

For now, I am satisfied with writing about my Potter themed birthday.

Potter birthday

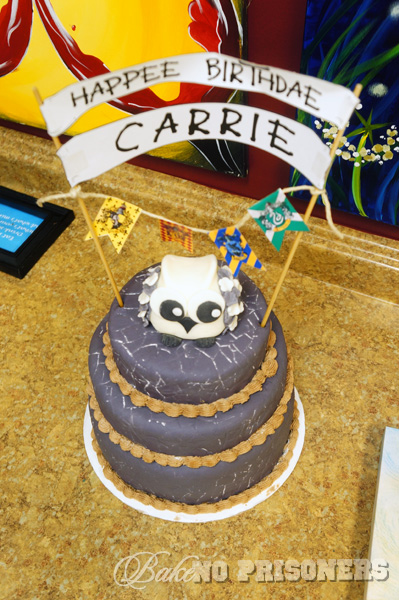
I just so happened to design and construct my own cake this year. My usual request is a double stuff, extra-large cookie cake from the American Cookie Co. I know. I get it. I’ve heard it a million times. There are a ton of bakeries and patisseries around my area and I choose a lame, commercially manufactured cookie cake. But moooooomm, it tastes like my childhood. Anyway, with the Potterhead theme underway, I thought it only fitting that I make my own cake.
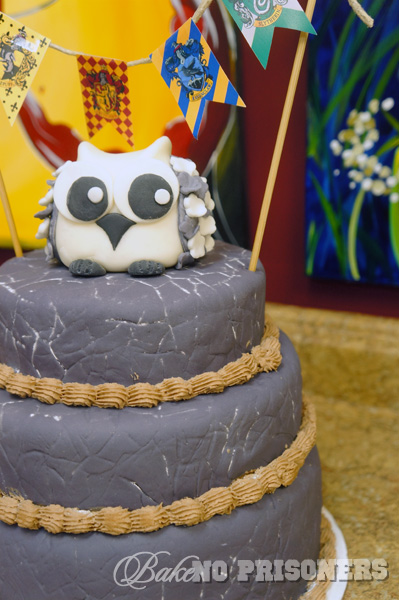
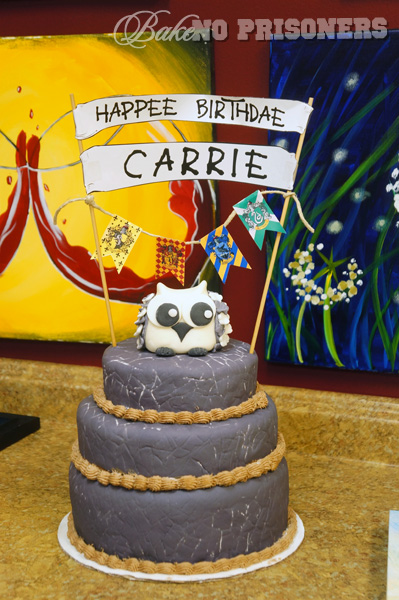
Potter birthdayI’ll admit, I got a little carried away. The more I thought about it, the more extravagant things got. I wanted to do my first ever 3-layer cake. Then I wanted to construct my first ever fondant owl. Then the fondant had to have a cobblestone affect. Finally, I had to have a banner. Because duh. Who doesn’t love a banner on their cake? So I made my favorite vanilla spice cake with whipped Nutella frosting and then wrapped my layers in homemade marshmallow fondant. I dyed it grey and made a cobblestone imprint with a fondant stamp I had. Then I brushed the cobblestone with confectioner sugar so that they would stand out a bit. {However, I soon discovered that the sugar melts into the fondant a whole lot faster than I expected.} Finally, I piped the extra Nutella frosting I had around my layers. I constructed my fondant owl using a bunch of videos I found on YouTube, along with my collection of fondant tools and cut outs. :)

Potter birthday

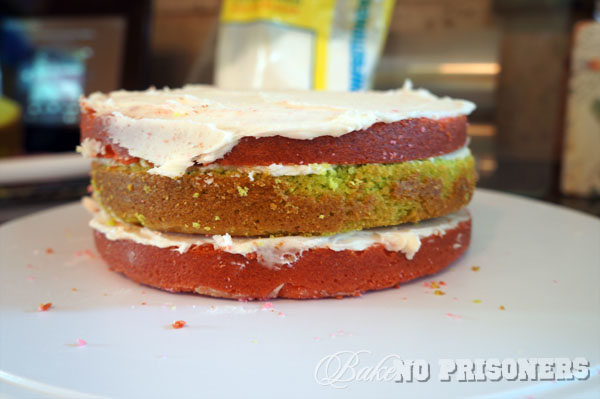
Each layer was a different house color for Gryffindor. The bottom layer was yellow and the top layers were red. Unfortunately, these were the only photos I had of the cake because we devoured it not long after they were taken.

In addition to the cake, all of us went out to do a little Potter painting.

Potter birthday

The amazing staff at Painting With a Twist happily created this one-of-a-king, never before introduced, Harry Potter inspired painting just for me. If you look carefully, you will notice Hogwarts at the top of the mountain, the Whomping Willow to the left, and a few of us even put in a Hedwig. Because Hedwig never really goes away, does he?

I call it…99 Problems but a Snitch Ain’t One.
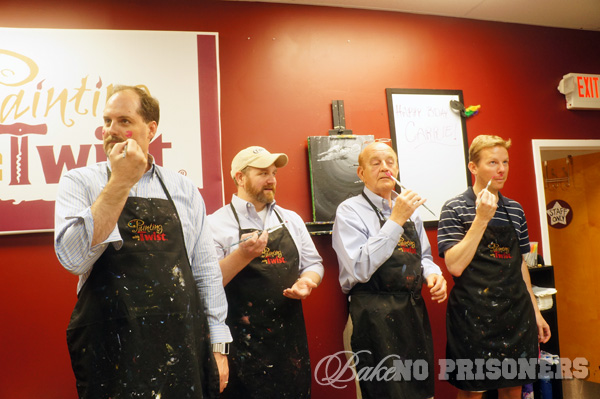
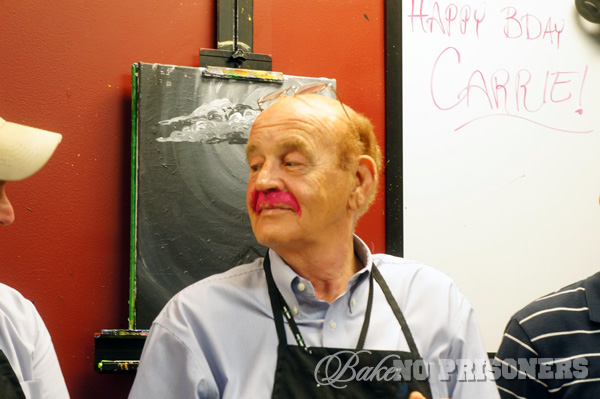
Potter birthdayThe boys got a little carried away with the paint…

No one told them it had to stay on the canvas.

Potter birthdayI think pink works for him…

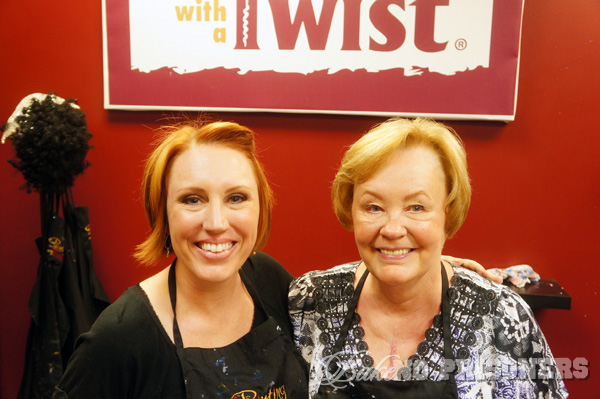
Potter birthdayI adore my friends and family. They made my birthday oh, so, special…here are just a few.

Potter birthdayFellow girly geek and con participant.

Potter birthdayMy pretty Momma…

Potter birthdayA big thank you to everyone who made it out. It was one of my best 29th birthdays so far!
Chocolate Layer Cake with Nutella Frosting

DSC06950_600x400

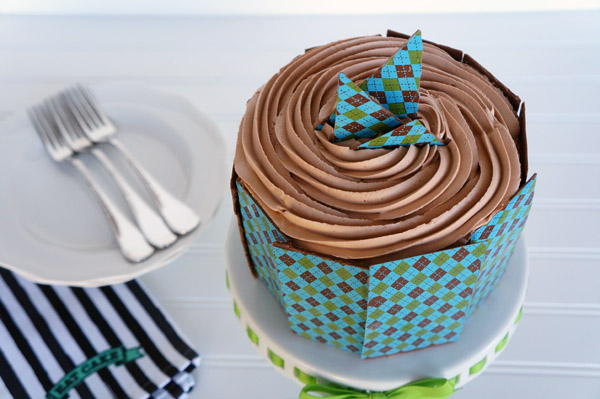
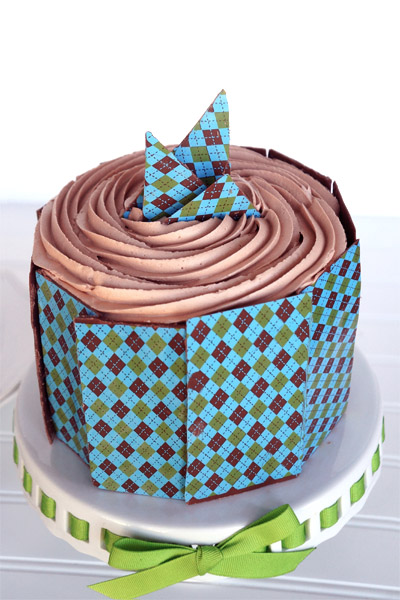
I recently started working with chocolate transfer sheets. They are totally easy and fun to work with and they have about a bazillion different designs and colors to choose from. The design I choose for this particular cake was a Springy blue and green gingham. Ya know. To make things fun and festive for the season. If you have never worked with them before, rest assured, you can do this. Chocolate transfer sheets are nothing more than strips of acetate that are embellished with cocoa butter. Sound complicated? Keep reading…

DSC06981_600x400

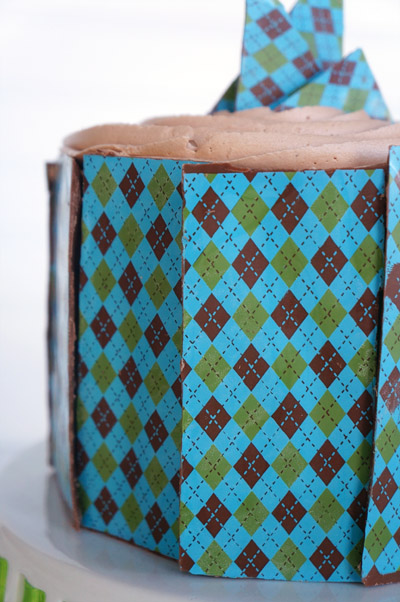
Begin by measuring the height of your cake. I started with a 6 inch round cake, about 4 inches tall. I had already lightly frosted my cake in butter cream, so it was all ready to go. Go ahead and pick up a bag of candy melts, any kind will do, but I like Wilton’s light cocoa, and follow the directions on the bag on how to properly melt them. Now you want your chocolate transfer sheets to be a bit taller than your cake, so when I got to measuring, I made sure to cut my transfer sheets in 4 1/2 inch tall strips. This gave me a little wiggle room when it came to putting it all together.

Place the raised side of your transfer sheets up on a prepared cookie sheet lined with parchment. You can use a small dot of melted chocolate as adhesive to “glue” the transfer sheet to the parchment paper. Don’t worry. It won’t hurt the transfer sheet and it will make the melted chocolate MUCH easier to work with. Gently spread your melted chocolate using an offset spatula to about a 1/8 thickness. Make sure to mark with a knife where your transfer sheet begins and ends.

Let it sit for about 5 minutes and then score it to the desired width. In my case, I scored my chocolate about 2-inches wide. Allow it to sit for a half hour to 45 minutes or until set. Once they are firm, go ahead and peel away the transfer sheets and use the scores you made before to separate your pieces. You may have to do this a few times to have enough pieces to go around your cake.

DSC07001_600x400

Once I had enough pieces, I overlapped them just a little to add some dimension. If your butter cream is cold or you don’t seem to have enough, just add a little to your transfer sheet to help attach it to the cake. Just be careful because the chocolate can be fragile. You could also wrap a pretty little bow around it to keep it all together as well.

DSC06966_600x400

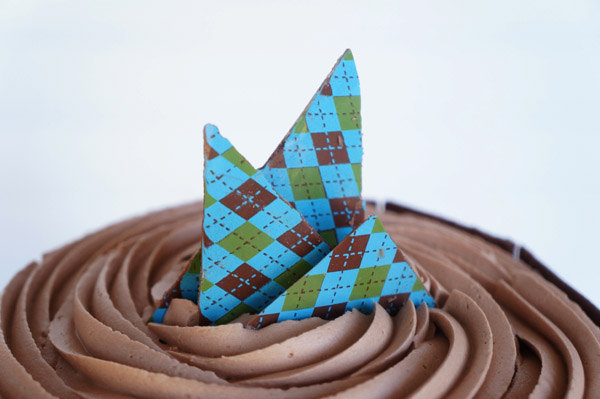
I had some leftover broken pieces, so I decided to create a little topper for my cake as well. All you have to do is carefully cut them into different shapes and place on top. Done and done.

DSC07008_600x400

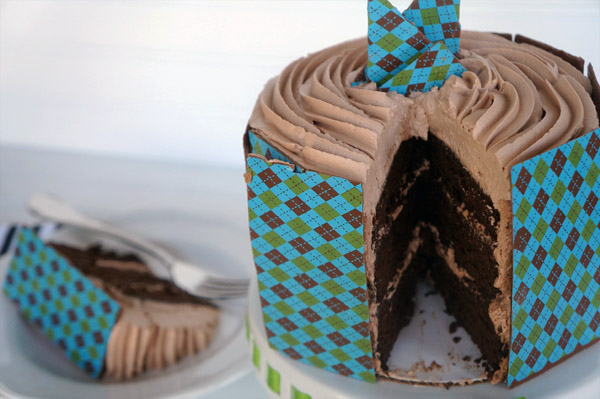
I used my most favorite chocolate cake recipe for this cake and then created a very simple, fluffy Nutella frosting. The Nutella frosting compliments the rich, moist chocolate cake perfectly. I am totally smitten with this cake and could’ve eaten the entire thing by myself. Happy Spring, you guys!
Most favorite Chocolate Cake recipe

Nutella Frosting

3 1/2 cups confectioner sugar

2 sticks{1 cup} unsalted butter, softened

1/2 cup Nutella

5 teaspoons milk

Directions:

In your stand mixer bowl using your paddle attachment, cream butter and slowly add confectioner sugar one cup at a time. Add Nutella and mix well. Add milk, one teaspoon at a time, until desired consistency. Mix on medium-high for 2-3 minutes until light and fluffy.


Over-the-Rainbow Orange Spice Cake {Gold Leaf Tutorial}

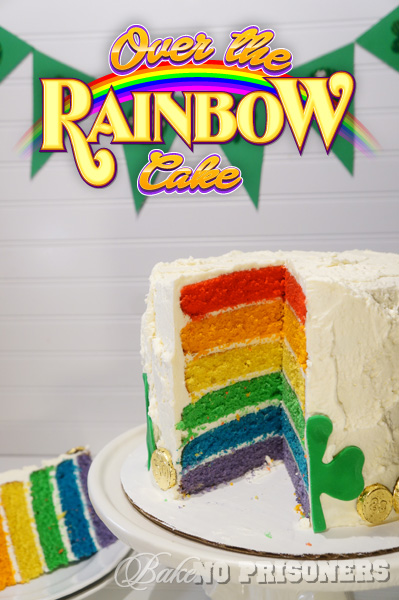
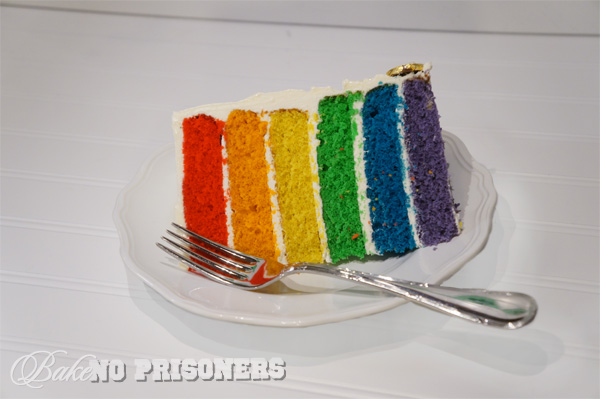
Over the Rainbow Orange Spice CakeI don’t know what it is about St. Patrick’s Day that makes me want to drink a tall Guinness and blast a little Flogging Molly, but every time March comes around, I can’t help but get a little giddy. I buy corn beef, slow cook it in Bass Ale and spices, and create a spicy, Guinness sauce to drizzle on top. Then I slap it between two pieces of fresh sourdough and add a little provolone. It is beyoooond amazing. I can’t take credit though. It is totally a Paula Deen recipe I found years ago in a magazine and the Hubster asks for it each and every St. Patty’s Day. And I just can”t help but oblige…wink wink nudge nudge…

But this year, there is a new dessert in town to compliment my oh-so-delicious black and tan sandwich tradition.

Over the Rainbow Orange Spice Cake

The recipe I used to create this 6-layer rainbow cake is actually pretty versatile. You can use it for a traditional vanilla cake, or you can make it more exciting by adding different extracts, spices, and other add-ins. For this cake, I added in a few spoonfuls of orange extract and baking spice to give it a more spice cake flavour. Another option would be to add in orange peel if you happen to have oranges on hand. The icing is a whipped buttercream, again flavoured with orange and vanilla extracts. It is light and fluffy and compliments the cake nicely.

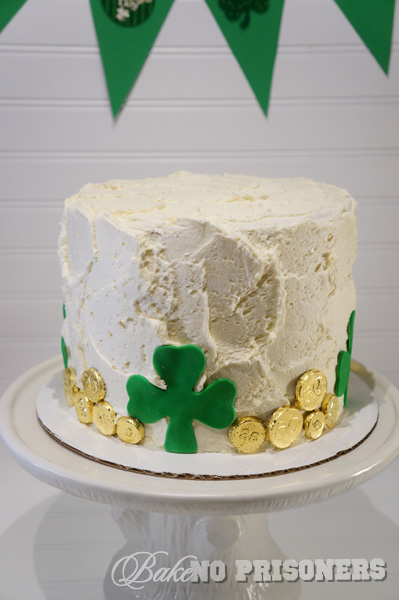
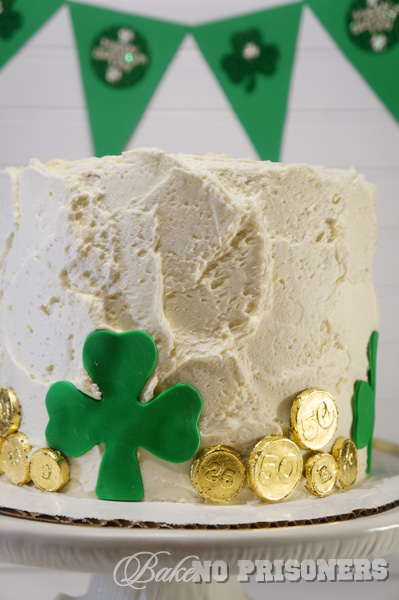
Over the Rainbow Orange Spice Cake

What really makes this cake though is the green fondant clovers and gold leaf coins that decorate the bottom. I kinda see it as the gold at the end of the rainbow, ya know?

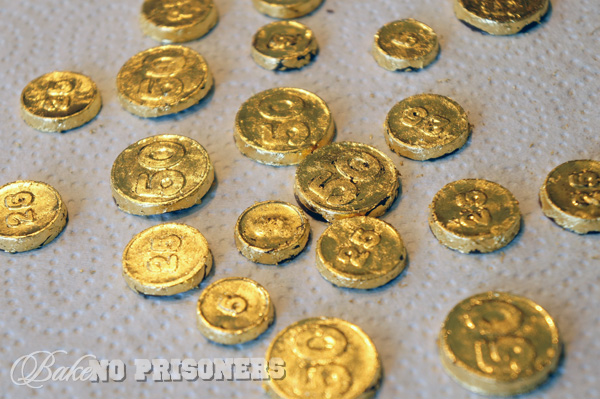
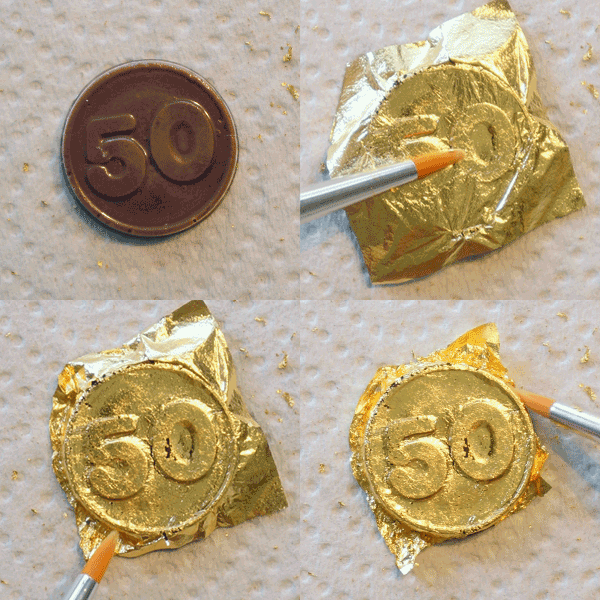
Earlier this month, I had ordered a chocolate coin mold on Amazon. I had been wanting to work with edible gold leaf for some time now and these chocolate coins seemed like the perfect opportunity, so I ordered edible gold-leaf too.

If you have never worked with edible gold leaf before, there are a few things you oughta know:

According to About.com Candy:

Definition: Edible gold leaf is a gold product that can be used to decorate food. In candy-making it can be used to cover whole candies like chocolates or truffles, or applied sparingly as a small decorative touch.

Is Gold Leaf Really Edible?

In most cases, yes. Gold is considered “biologically inert,” meaning it passes through the digestive tract without being absorbed. When selecting gold leaf, make sure to get gold that is as pure as possible–this means 22-24 carats. Gold leaf with a smaller carat value has more impurities and is less safe to eat. If you are careful and buy gold leaf that is clearly labeled as “edible” and has 22-24 carats, eating gold leaf is harmless.”

What’s important to remember is that if you plan to use gold-leaf on your cakes or other edible decorations, you need to make sure that your gold-leaf product is at least 22-24 gold carats. The product is usually labelled; you just need to check before ordering.

Edible gold-leaf tutorial

 How to apply gold leaf:

Gold Leaf Tutorial

Before I begin, let me tell you that this was the first time I had ever used gold leaf before and it is just my experience using it. If you have any tips or helpful hints, I am happy to listen!

What you will need:

  • Paper towels
  • 2 dry, small paintbrushes
  • edible gold leaf
  • chocolate coins
  • tweezers{optional}
  • latex gloves{Wearing latex gloves helps to prevent it from sticking to your fingers.}

What to do:

  • Lay down a few sheets of paper towels so that you have a clean workspace for your gold leaf coins.
  • Use tweezers to carefully lift up a small corner of the gold leaf sheet. Once you’ve caught it, use your small paintbrush to pick up the second corner and slide a small piece of the gold leaf onto your chocolate coin or edible decoration.
  • Use the other paintbrush to gently pat and smooth the gold leaf onto the decoration.
  • Continue to smooth out the remaining gaps or bubbles with your paintbrush.
  • Carefully pat down the edges with your paintbrush and remove the excess gold leaf.
  • Carefully place on cake.

Over the Rainbow Orange Spice Cake

Over-the-Rainbow Orange Spice Cake

Yield: 2 8-inch rounds

Recipe by Carrie

Ingredients

  • 1 1/2 cup all purpose flour
  • 1 cup granulated sugar
  • 1 teaspoon baking powder
  • 4 ounces{1 stick} unsalted butter
  • 2 eggs, 2 egg yolks, at room temperature
  • 1/2 cup{4 ounces} milk
  • 2 teaspoons orange extract
  • 1 teaspoon vanilla extract
  • 1 teaspoon baking spice or cinnamon

Instructions

  1. Preheat oven to 350° and line 2 8-inch round pans with parchment paper; spray with flour spray.
  2. In a medium bowl, combine flour, baking powder, and baking spice.
  3. In your stand mixer bowl, beat butter until creamy and fluffy; about 2-3 minutes.
  4. Add your sugar to your butter and beat until combined.
  5. Add your eggs and egg yolks; one at a time.
  6. Pour in your extracts; one at a time and mix well.
  7. Alternating, starting and ending with your dry ingredients, add your dry ingredients and milk.
  8. Mix for about 30 seconds and evenly pour into your prepared pans.
  9. Bake for about 18-20 minutes or until a toothpick inserted comes out clean.
  10. Note In order to make the 6-layer rainbow cake, you will need to triple the recipe and use gel food coloring to color the cakes.
Schema/Recipe SEO Data Markup by ZipList Recipe Plugin
http://www.bakenoprisoners.com/wordpress/index.php/over-the-rainbow-orange-spice-cake/


Glow-in-the-Dark Chocolate Cake

Glow in the Dark Chocolate Cake

So if you have been following me on Facebook {and you totally should}, you might know that the Hubs and I have been doing a little redecorating lately.  We wanted to update our living space, and sorta kinda make it more, um,  doggie friendly. If ya know what I mean…

I am not proud to admit this, but my dogs are not the best behaved dogs.

Oh sure, they are friendly enough and most certainly adorable. More so than most dogs in my opinion. They don’t mind loving on you and giving you kisses. Or snuggling up with you under the blankets when it’s cold. But when it is time to decipher whether to go potty outside or on Mommy’s couch, well that’s when we run into a situation.

We have tried just about everything. We go outside with them several times a day. Praise their potty behavior. Give them treats. But to no avail, they continue to leave me surprises. Any tips or tricks are much appreciated..

So when we started furniture shopping, we decided on a more modern and clean look. We ended up with a a dark brown tufted, leather couch with a chaise attached at one end with lime green accent pillows. It was one of those packaged whole room deals, so it came with new end tables and the most amazing, board-gaming, coffee table I have ever seen. It literally has two benches that pull out so that you can eat, play, or let’s say,  pull out your latest version of Harry Potter s Scene It? Cuz I mean, who doesn’t have Harry Potter Scene It?

I am totally smitten with my new living space and have claimed the chaise as my official spot. I know. So Sheldon Cooper of me.

Oh..so I almost forgot. I made cake.

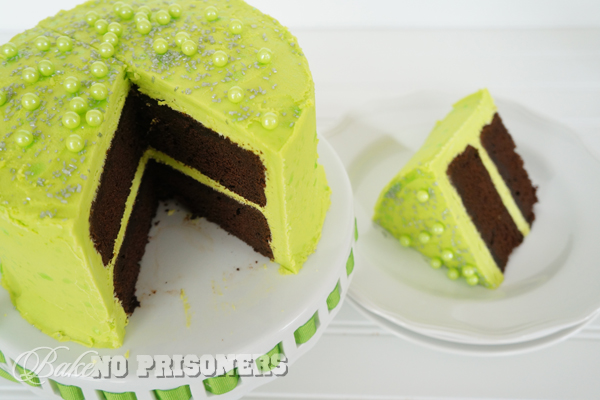
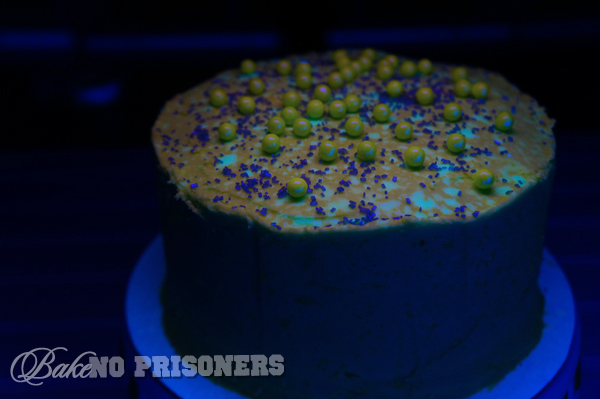
Glow in the Dark Chocolate CakeA friend of mine has a daughter who is turning 16 in a couple of months and she asked me if I could  make her a glow-in-the-dark cake. At the time, I had no idea how to make cake glow, so I took to the internet. The only thing I could find was Ghoulishly Glowing Cupcakes from Recipe Snobs. They created a fairly simple recipe made from lime green jello and tonic water that when placed under a black light, glows bright.

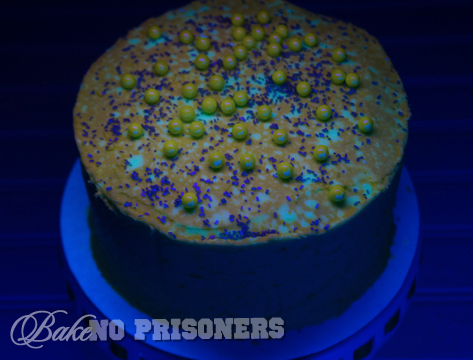
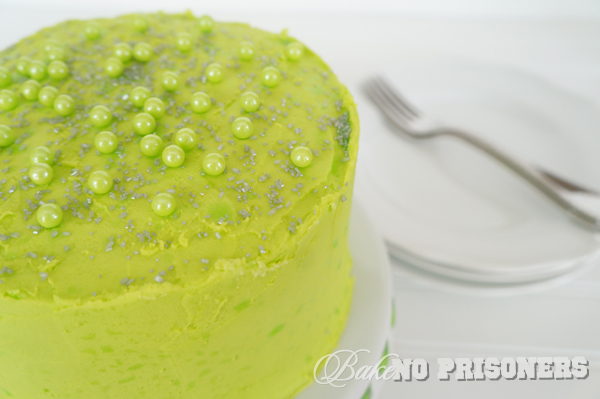
So to test it, I decided to take on a more 80′s feel with a splatter glow look for my cake. I followed the recipe posted for green glowing frosting and poured the jello part into a spray bottle and quickly sprayed my cake. It leaves a pretty, artsy feel to the cake, but doesn’t change the flavor of the frosting. I also added some bright green nonpareils and silver sprinkles because obvi.

I just love how my sprinkles turn purple under the black light.

Glow in the Dark Chocolate Cake

A couple tips I’ve found  for using the green glowing frosting..

1. If you are using a spray bottle, make sure you only pour the jello mixture into the bottle when you are ready to spray. It will congeal in the bottle if left by itself for too long.

2. Make sure your cake has been frosted and chilled, so that your jello spray doesn’t melt your frosting. Better yet, make sure you have an ice bath for your jello spray, so that it can keep cool while you spray.

Glow in the Dark Chocolate Cake

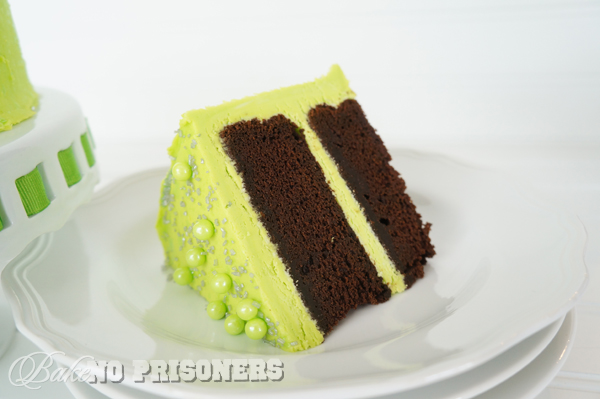
But the best part about this cake is that it looks just as pretty in the light..oh and that it’s chocolate. Duh.

Chocolate makes everything better. Especially when it is as easy as this recipe is. This is my go to chocolate cake recipe and it literally takes me less than 20 minutes to get it into the oven.

Moist. rich. and oh so chocolate-y.

Glow in the Dark Chocolate Cake

Glow-in-the-Dark Chocolate Cake

Yield: Two 8-inch rounds

Recipe by Carrie

Ingredients

  • 1 3/4 cups all-purpose flour
  • 1 cup granulated sugar
  • 1 1/2 teaspoons baking powder
  • 1/2 teaspoon baking soda
  • 1/4 teaspoon salt
  • 3/4 cup cocoa
  • 1/2 cup {1 stick} unsalted butter, softened
  • 1 cup strong coffee
  • 2 eggs, room temperature
  • 1 cup whole milk, room temperature
  • 2 teaspoons vanilla extract

Instructions

  1. Preheat oven to 350° and prepare two 8-inch pans by lining the bottom with parchment paper and flour spray.
  2. In a medium bowl, combine flour, cocoa, baking soda, baking powder, and salt.
  3. In your stand mixing bowl, cream butter on medium speed.
  4. Add eggs, one at a time, until combined.
  5. Add vanilla extract.
  6. With the mixer on low speed, slowly add half the dry ingredients to the wet.
  7. With mixer still on low, add the coffee and stir just to combine, scraping the bottom of the bowl with a rubber spatula, add the rest of your dry ingredients until combined.
  8. Pour the batter into the prepared pans and bake for 35 to 40 minutes at 350, until a toothpick comes out clean.
  9. Cool in the pans for 10 minutes, then turn them out onto a cooling rack and cool completely.
Schema/Recipe SEO Data Markup by ZipList Recipe Plugin
http://www.bakenoprisoners.com/wordpress/index.php/glow-in-the-dark-chocolate-cake/

Happy 3rd Bloggy Birthday, Bake No Prisoners!

Cherry Almond Cake

I am so excited for today! I can’t even…

Wanna know why?

This week marks Bake No Prisoners’ third blogiversary!

I can hardly believe it has been three years since I began Bake No Prisoners.  What started out as a little conversation of what-ifs with the Hubs has completely transformed into a journey of fun, learning, making new friends, and endless baking opportunities. I never dreamed in a million years that my little hobby would turn into something so important in my life.

To celebrate the occasion, I have compiled a little list of a few things I have learned over the past three years from baking, blogging, and you!

1. Originality – It is not as easy as it seems and you have to applaud those who have it and strive yourself, to own it.

2. Mistakes – You will make mistakes both in the kitchen and in life. I embrace those mistakes because it has made me a better baker, blogger, and friend.

3. Photography – I now know the ins-and-outs of what a good photo should look like. When I forget, please refer to #2.

4. Friends – Your friends aren’t just the ones you see face to face each day, they are also the ones on your computer screen.

5. Learn – The learning opportunities are endless. From the recipe creation stage to the writing itself,  I am continuously learning new things and because of that, I feel I will always be in love with BNP.

I cannot begin to thank all of you who continue to read, support, and encourage each week…

Cherry Almond Cake

Have a slice of birthday cake, would ya?

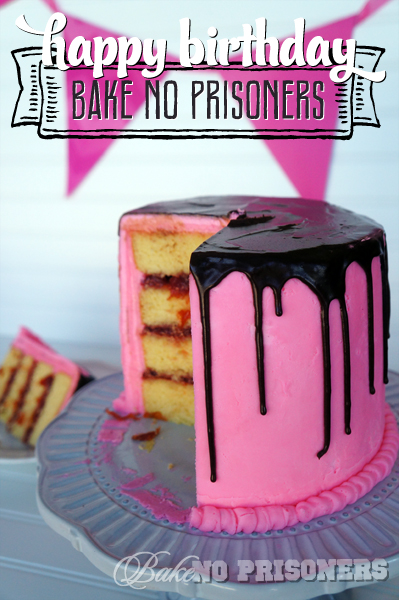
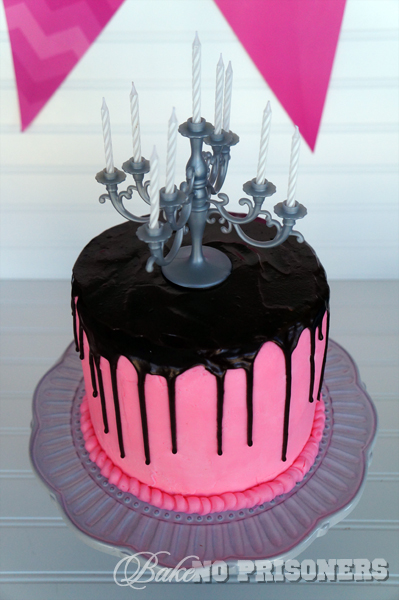
Cherry Almond CakeI wanted this year’s bloggy birthday cake to be somewhat rich and extravagant. I mean, how many times does a blog turn three, amiright? So I decided to make this 4-layer almond cake with tart cherry preserves. Then to make it even more amazing, I smothered it with rich buttercream and drizzled decadent chocolate ganache on top. Perfect birthday treat, I’d say…
Cherry Almond Cake

4-Layer Almond Cake with Tart Cherry Preserves

Yield: Two 8-inch rounds

Recipe by Carrie

Ingredients

    Cherry Almond Cake:
  • 1/12 cups all-purpose flour
  • 1 cup granulated sugar
  • 1 teaspoon baking powder
  • 1/2 teaspoon salt
  • 4 ounces {1 stick} unsalted butter, softened
  • 2 eggs, plus 2 egg yolks, room temperature
  • 1/2 cup {4 ounces} milk, room temperature
  • 1 1/2 teaspoons almond extract
  • 1 teaspoon vanilla extract
  • Tart Cherry Preserves {I found mine at Target}
  • Buttercream frosting:
  • 1 cup {2 sticks} unsalted butter, room temperature
  • 1 lb. confectioner sugar
  • 1 tablespoon meringue powder
  • 1 1/2 teaspoons almond extract
  • splash of heavy cream
  • Chocolate ganache:
  • 8 ounces semisweet chocolate
  • 3/4 cup heavy cream

Instructions

    4-Layer Almond Cake:
  1. Preheat oven to 350° and place your oven rack to the middle position.
  2. Spray two 8-inch round cake pans with flour spray and line bottom with parchment paper.
  3. In a medium bowl, combine flour, baking powder, and salt; set aside.
  4. In your stand mixer bowl, cream butter for 2-3 minutes.
  5. Slowly add sugar to your butter and mix until light and fluffy.
  6. Add your eggs and yolks, one at a time, until combined.
  7. Add your vanilla and almond extracts.
  8. Starting with your flour mixture, slowly add half to your butter blend, until combined.
  9. Carefully add your milk and then end with your other half of the flour mixture.
  10. Scrape the sides of the bowl and mix for another minute.
  11. Add a little more than a cup to each 8-in round pan.
  12. Bake for 25-30 minutes or until an inserted toothpick comes out clean; making sure the pans are at least 3 inches from each other and the sides of the oven.
  13. After 5-10 minutes, slide a knife around the sides of the pan. Remove the cakes from pan and transfer to wire rack.
  14. Allow cakes to come to room temperature before frosting.
  15. Buttercream frosting:
  16. In your stand mixer bowl, cream the butter on medium-high speed for 2-3 minutes making sure to stop to scrape the bowl once or twice.
  17. Reduce the speed to low and gradually add the confectioner sugar and meringue powder.
  18. Once all of the powdered sugar is incorporated, increase the speed to medium-high and add the vanilla.
  19. Add a splash or two of heavy cream until you achieve the desired consistency.
  20. Whip at medium-high speed until light and fluffy, 2-3 minutes, scraping the bowl as needed.
  21. Any unused frosting can be stored in an airtight container and placed in the refrigerator until future use; let frosting come to room temperature before using.
  22. Chocolate ganache:
  23. Pour your heavy cream in a medium saucepan and place on low heat.
  24. Chop your semisweet chocolate and place in a oven safe bowl.
  25. Once your cream begins to simmer, slowly pour over your chocolate.
  26. Let it sit for 2-3 minutes.
  27. Using a rubber spatula, slowly incorporate your chocolate into your cream.
  28. If it is too thin, let it sit for a few minutes to thicken up.
  29. Assembly:
  30. Use a serrated knife to level the top of your cakes {I normally wrap my cakes and put them in the refrigerator for about 30 minutes before I do this}
  31. Place the bottom cake layer on a cake plate or 8-inch round cake board.
  32. Place about 1/4 to 1/2 cup of tart cherry preserves on the top of the cake layer, and spread evenly with a small offset palette knife.
  33. Gently place the second cake layer face down on top; spread the cherry reserves on top and repeat with the following layers.
  34. Place a generous scoop of frosting on top, spreading evenly with a small offset palette knife and working your way down the sides until you have a thin layer of frosting over the entire cake.
  35. Chill until set, about 30 minutes.
  36. Remove from refrigerator and cover cake with a final layer of frosting.
  37. Drizzle sides with ganache first, using a pastry bag snipped at the end.
  38. Then carefully spread a thin layer on top.

Notes

To make four layers, you will need to double the recipe.

Schema/Recipe SEO Data Markup by ZipList Recipe Plugin
http://www.bakenoprisoners.com/wordpress/index.php/happy-3rd-bloggy-birthday-bake-no-prisoners/


Apple Cider Cakes with Cinnamon Cream Cheese Icing

I love the rain. I often tell the Hubs that I could totally pull off living in a London flat. All I would need is a super cute pair of Kate Spade rain boots and an umbrella that even Mary Poppins would approve of. Then I could go splashing through all the puddles on my way to the local bakery. Oh, and while I sat eating my chocolate croissant, I could check out the latest Doctor Who filming down the street. Cuz you know that would totally happen. Obviously.

So today was one of those days where I totally pretended that I lived in that imaginary London flat and baked while the rain came down.

Apple Cider Cakes with Cinnamon Cream Cheese Frosting

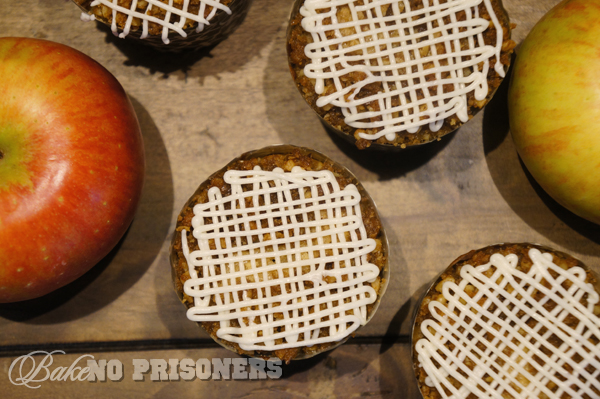
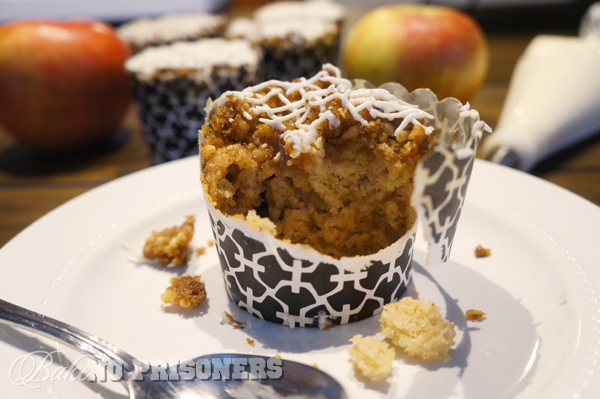
I had some leftover apple cider from our orchard trip, so I decided to bake up these baby apple cakes. To spice things up, I topped them with a simple walnut streusel and added a drizzle of cinnamon cream cheese icing. Best. Fall. Dessert. Ever.

Apple Cider Cakes with Cinnamon Cream Cheese Frosting

Apple Cider Cakes with Cinnamon Cream Cheese Frosting

Recipe by Carrie

Ingredients

    Apple Cakes:
  • 1 1/2 cups all purpose flour
  • 2 teaspoons baking powder
  • 1/2 teaspoon salt
  • 1 teaspoon cinnamon
  • 1/2 teaspoon nutmeg
  • 1/2 cup granulated sugar
  • 1/4 cup butter, softened
  • 1 egg, at room temperature
  • 1 teaspoon vanilla extract
  • 1/2 teaspoon cinnamon extract
  • 1/2 cup sour cream
  • 1/2 cup apple cider
  • 1 medium apple, skin removed, chopped
  • Walnut Streusel:
  • 1/2 cup light brown sugar
  • 1/2 cup walnuts, chopped
  • 1/2 teaspoon cinnamon
  • 2 tablespoons melted butter
  • Cinnamon Cream Cheese Icing:
  • 4 ounces cream cheese, softened
  • 4 ounces butter, softened
  • 2 cups confectioner sugar
  • 1 teaspoon vanilla extract
  • 1/2 teaspoon cinnamon extract
  • splash of heavy cream

Instructions

    Apple Cakes:
  1. Heat oven to 350° and line a standard muffin pan with paper liners.
  2. In a medium bowl, combine flour, baking powder, salt, cinnamon, and nutmeg.
  3. In your stand mixer bowl, beat butter and sugar until light and fluffy.
  4. Add your egg and extracts; scrape the sides of the bowl and continue to combine.
  5. Add sour cream and mix well.
  6. Alternating, starting and ending with the flour mixture, add a little flour mixture and then apple cider.
  7. Fold in chopped apples.
  8. Spoon mixture into your paper liners and bake for 15 minutes; total bake time will be 25-30 minutes, however you will need to pull them out early to top with streusel.
  9. Walnut Streusel:
  10. In a small bowl, combine light brown sugar, chopped walnuts, cinnamon and butter with a fork.
  11. Top apple cakes with streusel after 15 minutes and allow them to bake for an additional 10-15 minutes.
  12. Cinnamon Cream Cheese Icing:
  13. In your stand mixer bowl, combine cream cheese and butter and mix until light and fluffy.
  14. Add in your extracts.
  15. Slowly add in your confectioner sugar and beat well.
  16. If it is too thick, thin it out with a splash of heavy cream or milk.
Schema/Recipe SEO Data Markup by ZipList Recipe Plugin
http://www.bakenoprisoners.com/wordpress/index.php/apple-cider-cakes-with-cinnamon-cream-cheese-icing/

Butter Beer Pound Cake

Living in a small town has its ups and downs.

For example, I can go anywhere in town and it is almost certain that I will run into someone I know. We might grab a coffee or just catch up for a few minutes, but it’s nice to see a familiar face when I am out and about. That’s also a bad example because if you are au natural and in your sweats, then you are almost guaranteeing that you are going to run into someone you know. It has totally happened. On several occasions.

Another example is the festivals. We almost always have some sorta block party or festival going on. I love all the one-of-a-kind crafts, food vendors, and the classic rock bands you find at a small town festival. And they come up with all sortsa reasons to get together. It could be an art walk or a fall festival or even a party to celebrate the woolly worm. That’s happened too.

One of the worst things about living in a small town is that when you are a baker/girly geek/collector of all things nerdy, it is hard to find what you are looking for. A few weeks ago, I thought I would get a heads start on my Halloween baking. I wanted to buy a 4-pack of Butter Beer at my local grocery store. Before I even step foot in the store, I looked it up to make sure they would/could carry it. It is a bit of a hike to get to a good grocery store, so I wanted to make sure I didn’t go for nothing. I did. Go for nothing. They didn’t have it nor could they order it.

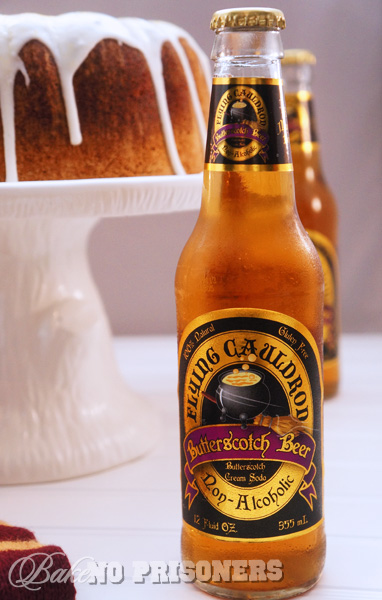
So I went home, did a bit more research, thought about ordering it online for a gazillion dollars, and then headed to my small town specialty grocer. As it turns out, they didn’t have it either, but they could order it. So I ordered two 4-packs…or so I thought. When they called me a few weeks later, they said my two cases were ready. Cases. As in six 4-packs in each case. A total of 48 bottles of Flying Cauldron Butterscotch Beer. As in more Butter Beer than the Hubs and I put together could drink in a month.

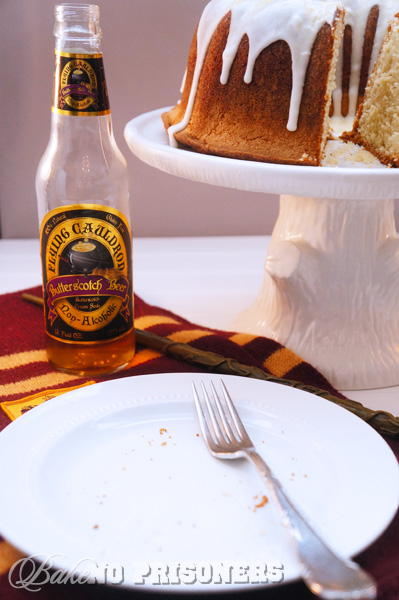
With all that Butter Beer, I thought about throwing a HP party. And I still just may, but for now I made you pound cake…with Butter Beer.

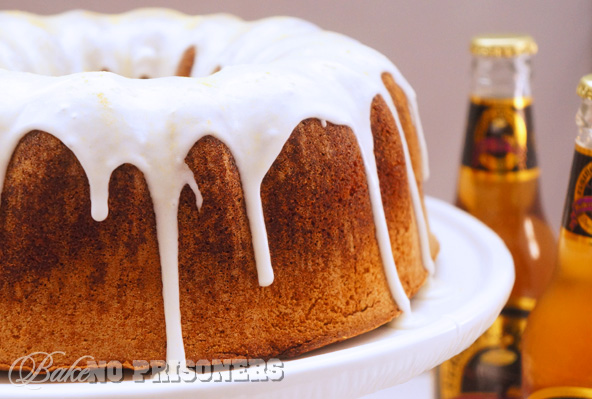
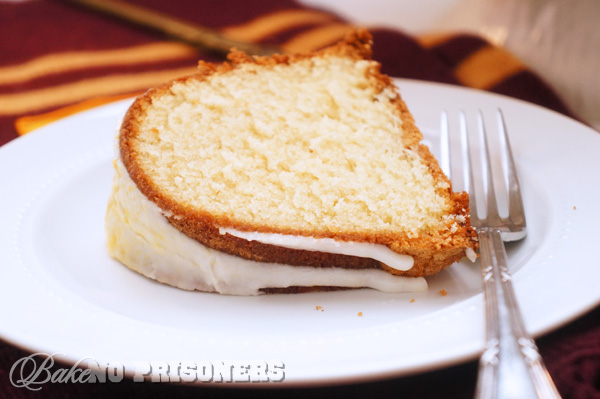
Butter beer pound cakeThis pound cake reminds me of all the Sprite and 7-Up pound cake recipes that are out there. I have never made one with soda before, so I just took my ole trusty pound cake recipe and altered it a bit. You know. With Butter Beer. Because I have so many.

Butter Beer Pound Cake

I even put some in my icing. Although it could totally stand alone.

Butter Beer Pound Cake

Butter Beer Pound Cake

Ingredients

    Butter Beer Pound Cake:
  • 3 cups all purpose flour
  • 3 cups granulated sugar
  • 1 cup {2 sticks} unsalted butter, softened
  • 6 eggs, at room temperature
  • 1 cup Flying Cauldron Butterscotch Beer
  • 2 tablespoons whole milk
  • 1 teaspoon vanilla
  • 1 teaspoon imitation butter flavoring
  • 1/4 teaspoon baking soda
  • pinch of salt
  • Butter Beer Icing:
  • 2 cups confectioner sugar
  • 2-2 1/2 tablespoonsFlying Cauldron Butterscotch Beer
  • 4 teaspoons heavy cream

Instructions

    Butter Beer Pound Cake:
  1. Preheat oven to 350° and spray desired pan with flour baking spray.
  2. In your stand mixer bowl, cream butter until light and fluffy.
  3. Add sugar and mix well; scraping the sides of the bowl and mixing again.
  4. Add eggs, one at a time until combined.
  5. Add milk, vanilla, imitation butter flavoring, and butter beer.
  6. In a medium bowl, combine flour, baking soda, and salt.
  7. Slowly add your flour mixture to your wet ingredients until blended.
  8. Spoon into greased pan; level with a spatula to smooth out the top.
  9. Bake for 55 minutes or until a toothpick or knife inserted comes out clean.
  10. Let cool for 5-10 minutes before removing your pan.
  11. Let cool completely on a wire rack before icing.
  12. Butter Beer Icing:
  13. Combine confectioner sugar, butter beer, and heavy cream in your stand mixer bowl until desired consistency.
  14. Spoon over pound cake and smooth over top.
Schema/Recipe SEO Data Markup by ZipList Recipe Plugin
http://www.bakenoprisoners.com/wordpress/index.php/butter-beer-pound-cake/

Butter Beer Pound Cake

S’mores Coffeecake

It’s that time of year again.

The time of year where students all over the globe are picking out new backpacks, trying on new shoes, and getting back into the school routine. They begin wondering whose going to be in their class, what their new teacher will be, and most importantly, what are they going to wear on the first day of school.

I don’t have any children going off to school, but I can tell you what it’s like from the other side…

I am a teacher and I love the beginning of the school year. I too, get excited about new school clothes and finding the perfect lunch box. I love getting to see old friends and co-workers and making new ones. We spend an entire week learning new concepts and programs, planning curriculum, and setting up our classrooms before the children arrive.

We wonder what our new class will be like. Whether our new students will like us or not {because it does matter, even if we say it doesn’t}. And we hope everything will be perfect for the first day of school.

So to wrap up the end of summer and kick off the start of yet another school year, I made you coffeecake…

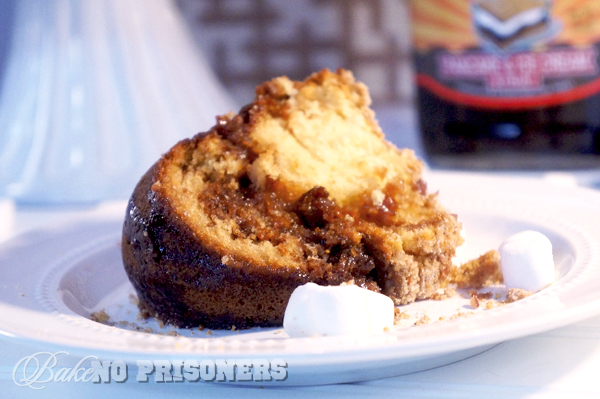
Smores Coffeecake

 More importantly, S’mores Coffeecake.

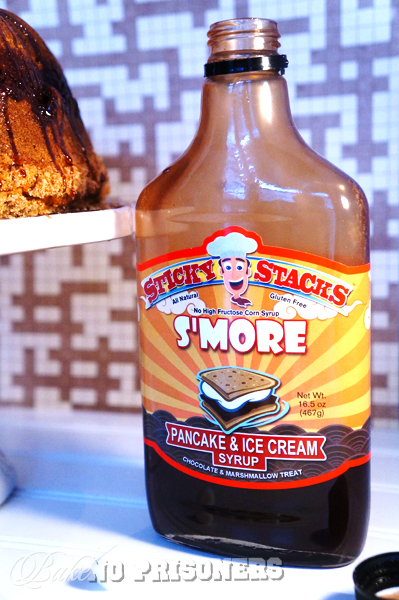
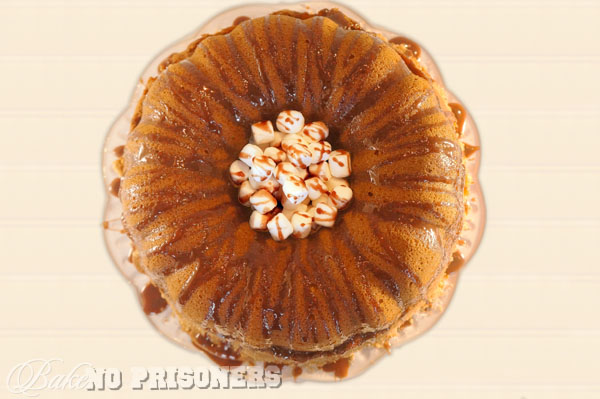
I took your everyday coffeecake and added a layer of ooey gooey marshmallow and graham cracker streusel with a chocolatey S’mores syrup drizzle. I found the most amazing S’mores Pancake and Ice Cream syrup at World Market the other day and thought it would go perfect for my coffeecake. It totally did.

It also did on my ice cream that night.

And my waffles the next morning.

Smores CoffeecakeThe great thing about this coffeecake is that not only is it yummy delicious on the first day, but the syrup soaks into the cake and makes it even better the second day. That is not normally the case when we are talking about coffeecake.

S'mores Coffeecake

Smores Coffeecake

Recipe by Carrie, adapted from Baking Illustrated

Ingredients

    For the streusel:
  • 3/4 cup all purpose flour
  • 3/4 cup sugar
  • 1/2 cup light brown sugar
  • 1/4 cup graham cracker crumbs
  • 1 1/2 tablespoons baking spice or cinnamon
  • 1/2 cup pecans, chopped
  • 3 tablespoons butter, cold
  • For the cake:
  • 4 large eggs
  • 1 1/2 cup sour cream
  • 1 tablespoon vanilla extract
  • 2 1/4 cups all purpose flour
  • 1 1/4 cup granulated sugar
  • 1 tablespoon baking powder
  • 3/4 teaspoon baking soda
  • 1/4 teaspoon salt
  • 12 tablespoons {1 1/2 sticks} butter, softened
  • Bag of mini-marshmallows
  • S'mores Pancake and Ice Cream syrup

Instructions

    For the streusel:
  1. Pour the flour, sugar, brown sugar, graham cracker crumbs, baking spice, pecans, and butter in a food processor and pulse 10 times, about 1-second per pulse to combine.
  2. You should have pea sized bits and your streusel should look like wet sand.
  3. Set aside and start on the cake.
  4. For the cake:
  5. Preheat oven to 350° F and adjust your oven rack to a lower position.
  6. Grease or spray a tube pan or a bundt pan and set aside.
  7. In your stand mixer, combine eggs, sour cream, butter, and vanilla.
  8. In a large bowl, combine flour, sugar, baking powder, baking soda, and salt.
  9. At low speed, add your dry ingredients to your wet ingredients in your mixer.
  10. Increase to medium speed and beat for about a minute.
  11. Scrape the sides of the bowl with a spatula and mix again for 30 seconds.
  12. Add 2 cups of the batter to the prepared pan.
  13. Level out the batter with an offset spatula.
  14. Sprinkle about half of your streusel over the top of your batter evenly.
  15. Add an even layer of mini-marshmallows over the top of the streusel.
  16. Drizzle S'mores Pancake and Ice Cream syrup evenly over the mini-marshmallows.
  17. Pour another 2 cups of the batter over the streusel, spreading evenly, and then add the rest of your streusel.
  18. Bake for 45-55 minutes or until a toothpick inserted into the center comes out clean.
  19. Cool the cake in the pan for about 25 minutes.
  20. Invert the cake using a rimmed baking sheet over the top of the cake.
  21. The cake should now be upside down, with the streusel on the bottom.
  22. Place the cake on a wire rack to cool.
  23. Drizzle S'mores Pancake and Ice Cream syrup across the top of the cake.
  24. Serve immediately.
Schema/Recipe SEO Data Markup by ZipList Recipe Plugin
http://www.bakenoprisoners.com/wordpress/index.php/smores-coffeecake/


Peachy Crumb Cake

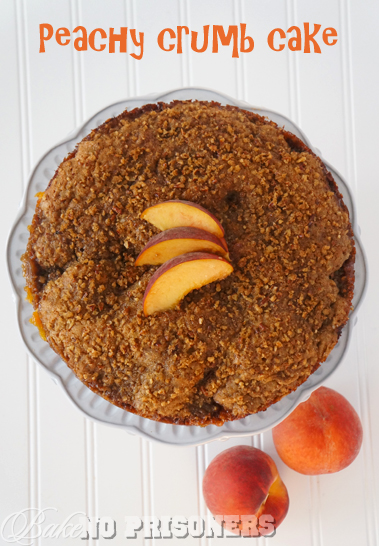
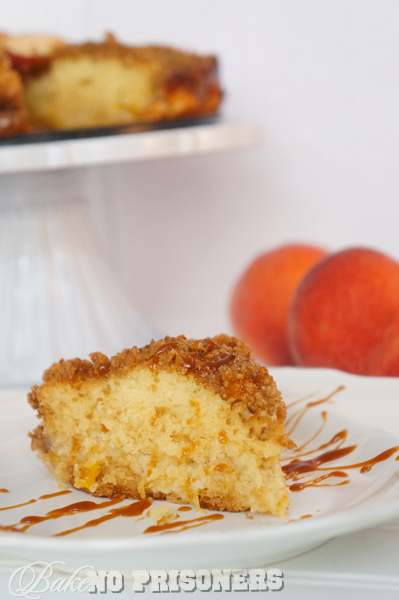
I love me some peaches…Being so deep in the South, we have the best peaches all around us. My most favorite type of peach comes from Georgia. They are so juicy and sweet and I absolutely love to bake with them during the summertime. The Hubs is not the biggest fan of peaches, but he will eat them if they are hidden away in a cake. Soooo…

Might I introduce you to Peachy Crumb Cake. {It kinda sounds like a name…doesn’t it?}

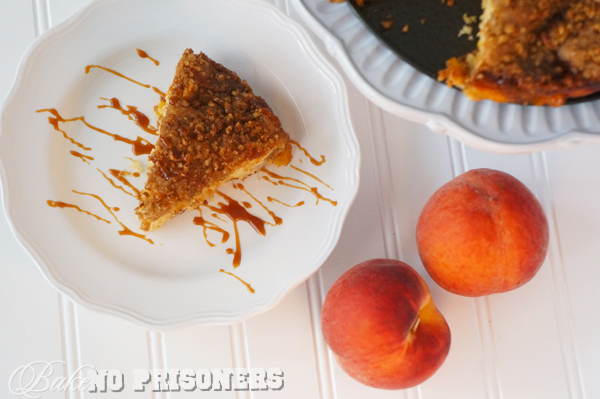
Peachy Crumb Cake

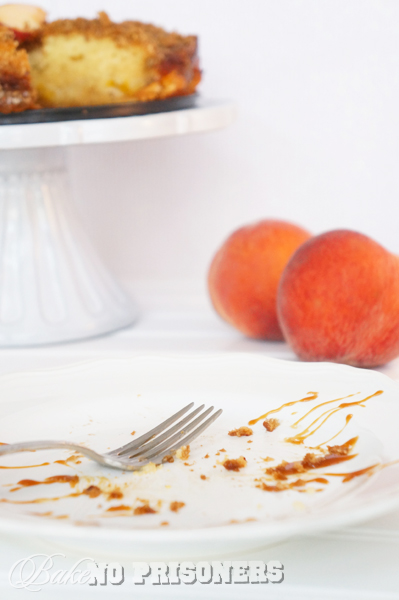
Now technically it is a cake, however it is loaded with everything that screams breakfast food, so if you wanted to eat it, like say around 9am or so, then I would think it would be deemed perfectly acceptable. In fact, I made this cake in the morning and had myself a big piece, so yeah, it is totally breakfast worthy.

Peachy Crumb Cake

The secret to this cake is to use ripe, juicy peaches. I would scour the farmer’s markets or local fruit stands to find them. I was lucky and found mine at Trader Joe’s. If they’re firm, just let them sit out for 24-48 hours. You should be able to smell them and they should feel a bit squishy.

Peachy Crumb Cake

Peachy Crumb Cake

Recipe by Carrie

Ingredients

    For peach filling:
  • 5 ripened peaches, coarsely chopped
  • 2 tablespoons sugar
  • For the cake:
  • 2 cups all purpose flour
  • 1 cup granulated sugar
  • 1 teaspoon baking powder
  • 1 teaspoon baking soda
  • 1/2 teaspoon salt
  • 10 tablespoons {1 1/4 stick} butter, softened
  • 3/4 cup whole milk
  • 1 large egg, room temperature
  • 1 teaspoon vanilla extract
  • For the topping:
  • 1/2 cup pecans, chopped fine
  • 3/4 cup brown sugar, packed
  • 3 tablespoons butter, melted

Instructions

    For the peach filling:
  1. In a medium saucepan on medium low heat, add your chopped peaches and sugar.
  2. Let peaches simmer for about 15-20 minutes or until they have almost broken down. Your filling should be thick with small chunks of peaches.
  3. Set aside and let them cool to room temperature.
  4. For the cake:
  5. Preheat your oven to 350 degrees, making sure your oven rack is in the middle position.
  6. Lightly grease the bottom and sides of a 10-inch springform pan.
  7. In your stand mixer bowl, combine butter and sugar and mix until light and fluffy.
  8. Add egg and vanilla to your butter mixture.
  9. In a separate mixing bowl, whisk flour, baking powder, baking soda, and salt.
  10. Starting with your flour mix first, take turns pouring your flour and milk a little at a time, and ending with the flour mix.
  11. Make sure to scrap the sides and bottom of bowl and mix until combined.
  12. For the topping:
  13. In a small bowl, use a fork to combine pecans, brown sugar, and melt butter.
  14. Putting it all together:
  15. Using a rubber spatula, scrape half of the batter into the prepared pan and smooth the top.
  16. Add your peach filling, making sure to spread it evenly and carefully over the batter.
  17. Add the rest of your batter and smooth the top again.
  18. Sprinkle your brown sugar pecan mixture with a spoon or your hands until it is evenly distributed.
  19. Bake until the center is firm and a tooth pick comes out clean, about 50 minutes.
  20. Transfer the cake to a wire rack and let cool completely before serving.
Schema/Recipe SEO Data Markup by ZipList Recipe Plugin
http://www.bakenoprisoners.com/wordpress/index.php/peachy-crumb-cake/

Peachy Crumb Cake

Ribbon Cake Tutorial

DSC01813_600x400

I hope everyone had a lovely Valentine’s Day last week! What did you guys do?

Did anyone have something special planned?

A trip, maybe?

Every year, the Hubster makes cheese fondue at home for me because I don’t like to go out to dinner too often, especially on holidays.  He makes the best fondue you guys!! We dip apples, bread, and veg until our tummies are about to bust and then we find room for dessert.

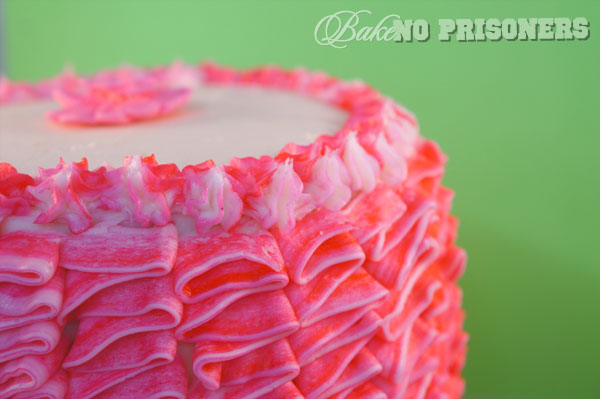
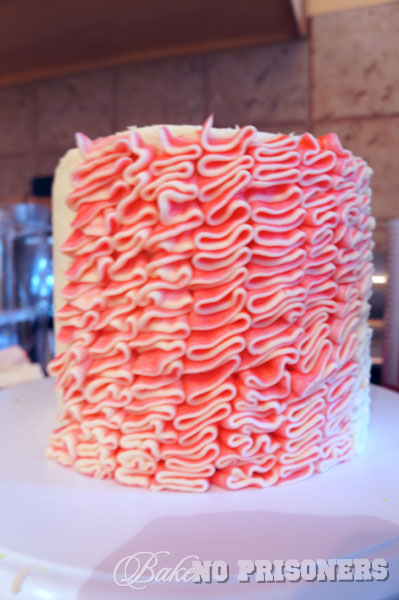
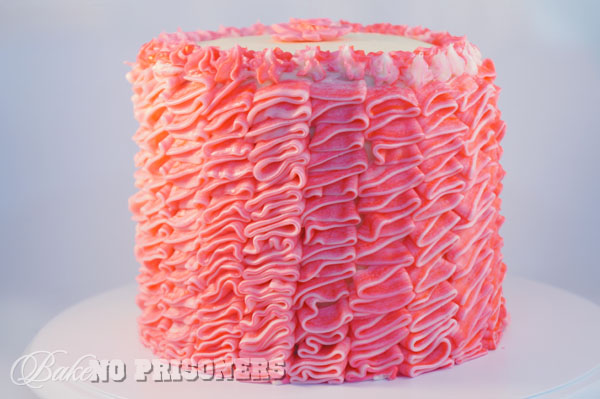
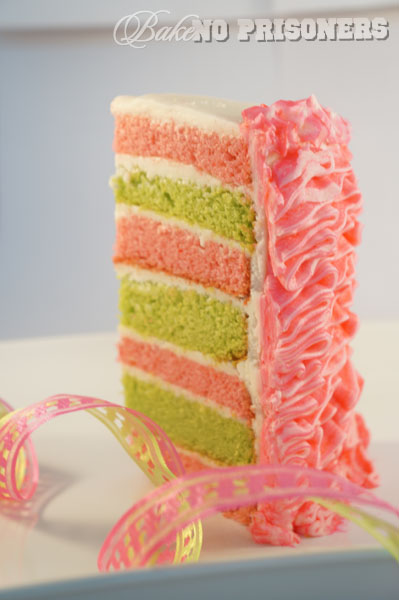
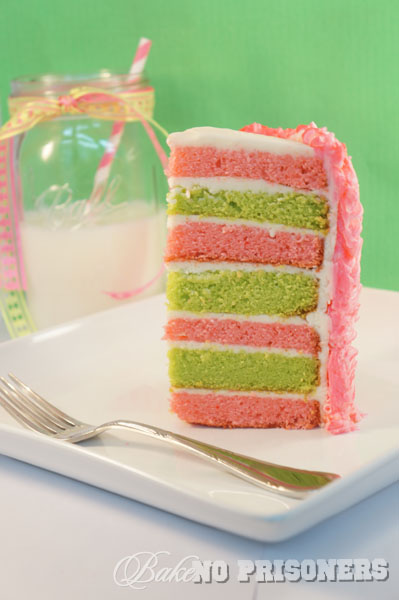
This year, I thought I would try and spice things up with this neon pink and green, cotton candy ribbon cake. It is seven layers of cotton candy goodness, with neon pink ribbon frosting from top to bottom. First rule of thumb when decorating a ribbon cake is that this is totally easier than you think it is going to be. I want to take you guys through it, step-by-step, just to prove to you how simple this cake was to decorate.

DSC01775_600x400

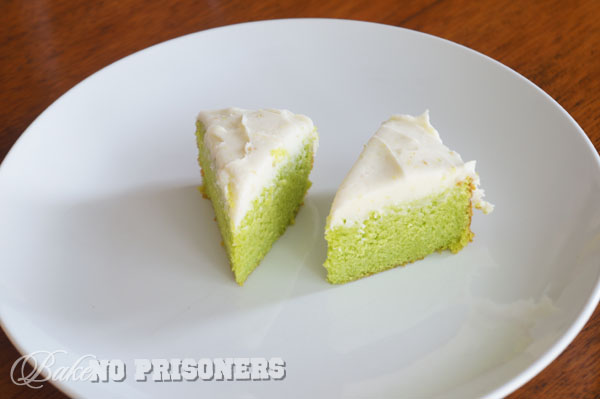
First, take your favorite cake recipe and make 2 8 in. rounds. In this case, I made one electric pink and the other neon green. You can use the basic vanilla cake recipe I have posted before and just half the vanilla with your favorite flavoring. Or in my case, I used the cotton candy flavoring oil at Layer Cake Shop. Use any flavoring oil very sparingly, a few drops is perfect.

Once completely cool (I store mine in the refrigerator for an hour or so) level each cake and then slice each cake in thirds. You can use a cake leveler if you want, but for this cake, I just eyeballed it. You can tell my layers aren’t exactly perfect, but that’s ok with me.  Frost in between each layer with your favorite buttercream, starting and ending with a pink layer.

DSC01781_600x400

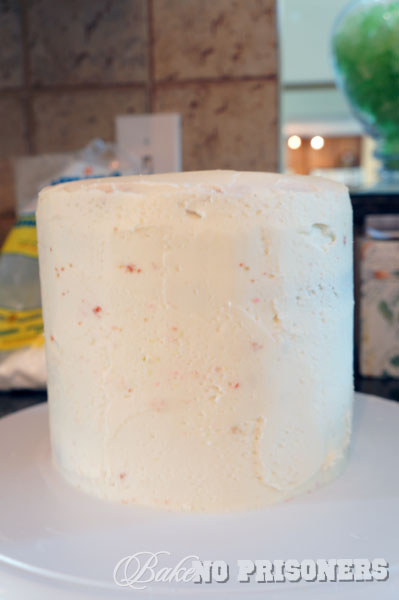
Once you have layered and assembled your cake, crumb coat your cake and place back into the fridge for an hour or even overnight. Crumb coating makes it a lot easier to frost a cake because once refrigerated, you don’t have to worry about getting crumbs in your frosting. It also aids in keeping your frosting straight and  level. I normally put mine in the fridge overnight because I just don’t have the time to bake, crumb coat, and frost a cake in an average day.

DSC01790_600x400

I took the last green layer and frosted it for the Hubster to snack on or bring to the office.

Sometimes our furry house elves get a little bite too!

DSC01806_600x400

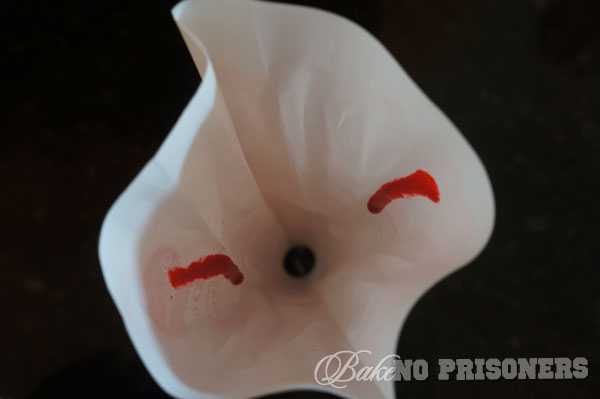
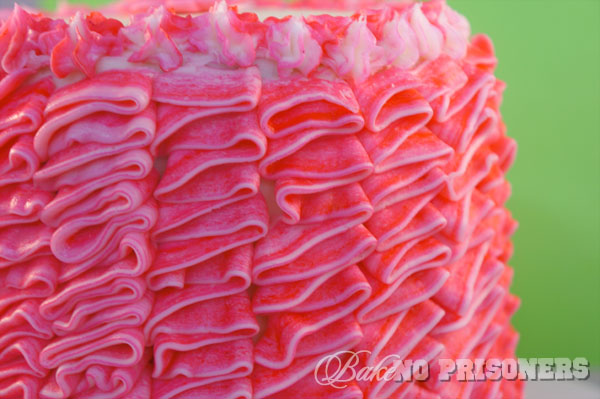
Take your pastry bag and attach your coupler and tip 103 or any rose tip you have and place the bag into a tall glass. To give it  more of a ribbon candy look, I dripped my electric pink food coloring down the sides of the bag before placing the frosting inside. That way, when I started to pipe the frosting, my ribbons would come out looking like this.

DSC01810_600x400

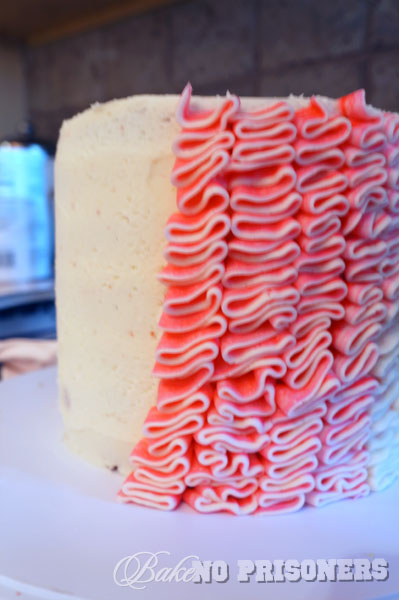
You want to make sure you are holding your pastry bag vertically against the side of the cake, starting at the bottom, and move in a horizontal 1 inch direction, back and forth. You want to try to keep your lines straight, but it is totally ok if you start to slant like me. You can make it up on the next line of ribbons. Remember, practice makes perfect.

DSC01811_600x400

See! They are much straighter now from this view. Go around the entire cake making 1 inch ribbons from bottom to top.

DSC01814_600x400

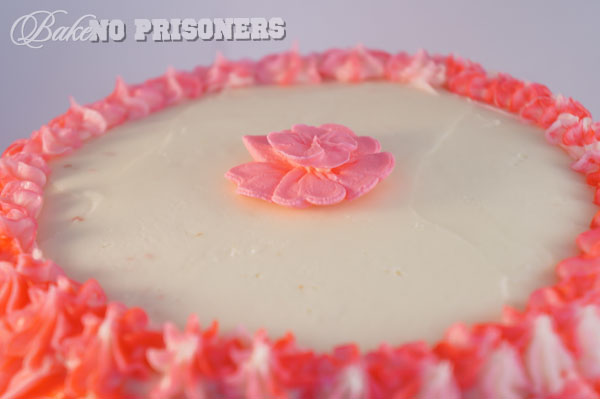
Finally, I used a star tip to pipe a small ring of stars around the top to hide any mistakes and to bring together the ribbons with the top of the cake.

DSC01849_600x400

I also added a pink royal icing flower in the middle I had made previously.

DSC01846_600x400

Neony and bright….just ready to be cut into and eaten!

DSC01855_600x400

We ended up splitting one piece between the two of us!

DSC01898_600x400

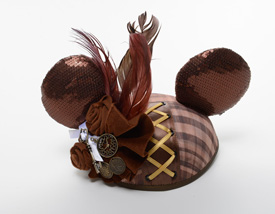
By the way, this is what the Hubster got me for Valentine’s Day! SQUUUUEEEEE!!!

 Limited Release Disney Couture Ear Hats Kick off the 'Year of the Ear' at Disney Parks

*This is from Disney’s  January 2013 Year of the Ear. They are introducing 5 new limited release Disney Couture Ear Hats each month.