Salted Caramel Sauce

Ask anybody who knows me and they will tell you that I like to save money. If I can make it, bake it, or create it, I will do it just to save a few dollars.

Well that includes everything except sewing.

I bought a 1966 Singer at a thrift store a year ago and even went into town to the local sewing shop to sign up for the beginner’s class. The owner of the shop asked me if I could do a few simple beginner steps that everyone should know like threading your own machine, sewing a button, etc. You get the idea. I told her the closest I ever got to sewing something was 8th grade Home Ec. and even then I wasn’t that great. So she told me I would need a beginner’s to beginner’s class. Yeah. I would be the only one in the class. Nevertheless I said yes. She said she would call when she had an opening in her schedule.

She never called.

I never followed up.

I can’t sew.

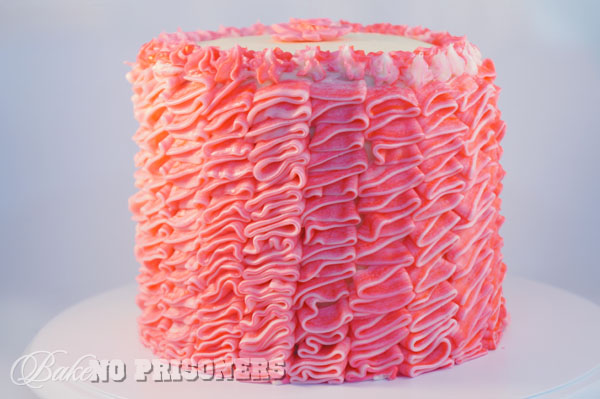
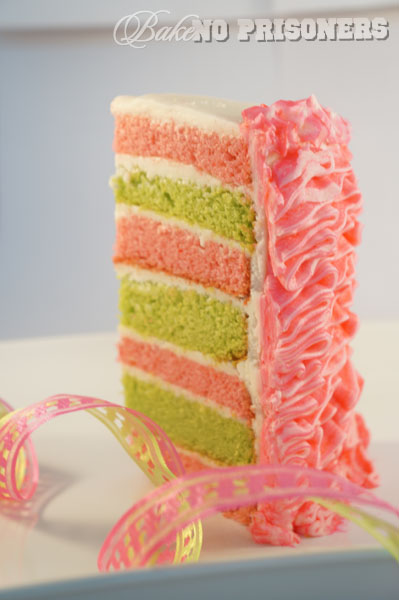
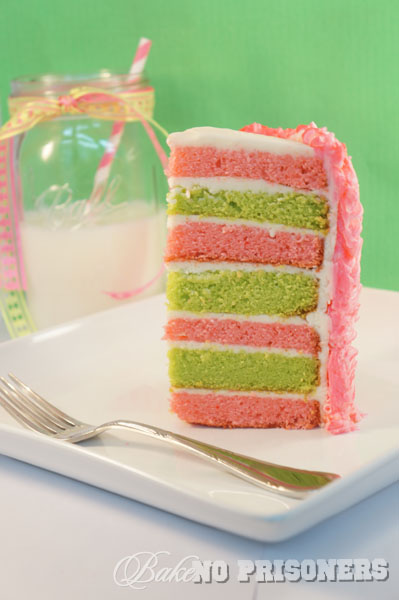
Buuuuuut, I do try to save money and create with everything else in my life. Like this salted caramel sauce.

Salted Caramel Sauce
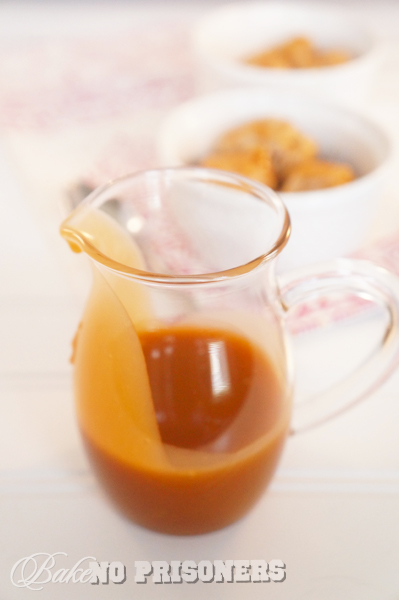
Why pay up to five or six dollars for a jar of caramel sauce when with just a few ingredients and 25 minutes, you have your own, better tasting, no preservatives, salted caramel sauce.

Salted Caramel Sauce

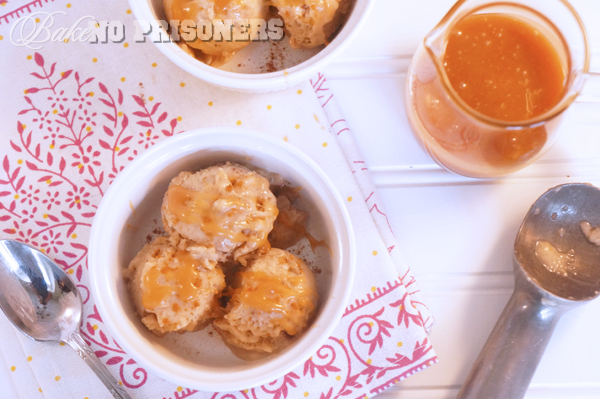
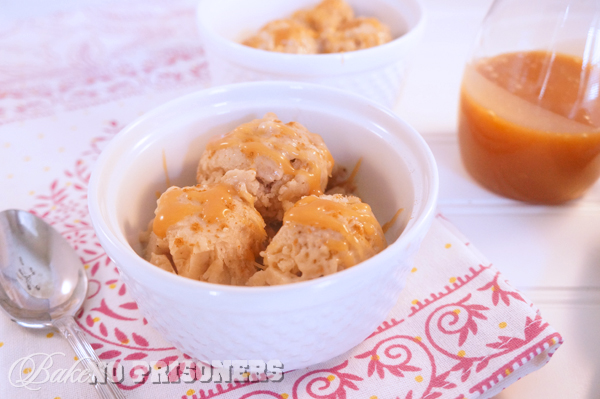
And why stop there? Drizzle it on top of your new-craze-one-ingredient ice cream everyone is talking about these days! I made one-ingredient banana ice cream the other day and just sprinkled cinnamon and drizzled my salted caramel sauce on top for more of a banana’s foster sorta feel.

Salted Caramel Sauce

Salted Caramel Sauce

Ingredients

  • 1 cup granulated sugar
  • 1 tablespoon water
  • 1 tablespoon light corn syrup
  • 5 tablespoons butter, sliced and at room temperature
  • 1/2 cup heavy cream
  • 1 teaspoon fleur de sel
  • 1 teaspoon vanilla

Instructions

  1. Before you begin, measure out all your ingredients and have them ready to use. It is very easy to burn your caramel if you are not prepared.
  2. On medium-high heat, combine sugar, water, and light corn syrup in a 2-3 quart saucepan. Whisk the sugar mixture continuously until it melts completely. It may clump at first, but that is perfectly normal.
  3. Once melted completely, stop whisking and allow the sugar to bubble for several minutes. It will begin to take on a deep amber color. This is what you want. If you are new to making caramel, use a candy thermometer until it reaches 350 degrees.
  4. Slowly and carefully add the butter and whisk until completely melted.
  5. Remove your pan from the heat and slowly pour in your heavy cream while whisking continuously.
  6. Still whisking, add your fleur de sel and vanilla until all the ingredients are incorporated and the caramel is smooth.
  7. Allow the caramel to cool in the saucepan for about 10-15 minutes. This will allow it to thicken up a bit as well.
  8. Carefully transfer your caramel to a glass jar and allow it to cool to room temperature.
  9. Caramel can then be placed in the refrigerator and stored for up to 30 days, but we all know it won't last past the weekend. :)
Schema/Recipe SEO Data Markup by ZipList Recipe Plugin
http://www.bakenoprisoners.com/wordpress/index.php/salted-caramel-sauce/


Thomas the Train Cupcake Tutorial

Thomas the Train cupcakes

I like trains.

I am a huge fan.

I often daydream about boarding the Hogwarts Express with Harry, Ron and Hermione, or riding an old steam locomotive and spending the afternoon gazing upon the English countryside, like in some sorta Agatha Christie novel.

Well, this Saturday was E’s 3rd birthday and he wanted a Thomas the Train themed party. So his Mom and I put our heads together and we decided that I would make these adorably cute Thomas the Train cupcakes.

Thomas the Train cupcakes

Since I don’t have small children of my own, I wasn’t sure where to begin, so I scoured the internet for all things Thomas the Train. After a little digging, I found all sorts of ideas to pull from. Not to mention I could tie in all the bits of information I knew about trains as well.

Thomas the Train cupcakes

Thomas was easy enough to put together. I started with the large, medium, and small circle cutters you can find in the baking section at Micheal’s. I rolled out white fondant I had tinted blue, to an 1/8 of an inch and used my large circle cutter to cut out my base.

Thomas the Train cupcakes

To make my black outline, I rolled out black fondant, again to 1/8 of an inch, and used my medium circle cutter. For the the grey Thomas face, I used a small bit of black candy clay(about the size of a dime) I had and mixed it in with a golf ball size of white gum paste. If you do not have candy clay, black fondant would work as well. Using my  small cutter, I cut out his face.

Thomas the Train cupcakes

For his eyes, I used the mini circle cutter and then used this circle cutter for his nose. I found it among the mountainous pile of cookie cutters I currently own. It was the perfect size. After I cut it out, I rolled it between the palm of my hands to form it into a ball. Rolling out the dough and cutting it with the same cutter would ensure that every nose would be the same size.

Thomas the Train cupcakes

To make his smile, I rolled out my fondant and then used my mini circle cutter to cut out additional circles. Then I used the edge of the cutter to cut out a smile from each circle.

Thomas the Train cupcakes

To add the smoke stack, I took my black fondant and cut out 1 inch squares. Using my medium circle cutter, I trimmed one side of the square, so that it would line up with my black outline.

Thomas the Train cupcakes

After I had cut out all the pieces I needed for Thomas, I attached them using a gum paste-water adhesive. If you are not used to working with gum paste, then a little water will work just as well. If you would like a stronger bond, then simply drop tiny bits of gum paste into 2 inches of water and let sit for 10-15 minutes. The gum paste will melt and your water will become cloudy. Use a small brush to stir and apply your adhesive to your fondant pieces and let dry completely.

Thomas the Train cupcakes

I did add a 1/2 in. by 1 in. red horizontal strip with two black vertical stripes along the bottom like Thomas has, but I forgot to take a picture. To add his black eyes and eyebrows, I used an edible black pen by Wilton. Thomas the Train cupcakes

To mixed things up, I also made a Railroad Crossing sign and a set of railroad tracks. For the railroad tracks, I was able to use my new wood imprinting mat to give it a more realistic feel.

Thomas the Train cupcakes

Happy 3rd Birthday E! I hope you had a wonderful day!


Ribbon Cake Tutorial

DSC01813_600x400

I hope everyone had a lovely Valentine’s Day last week! What did you guys do?

Did anyone have something special planned?

A trip, maybe?

Every year, the Hubster makes cheese fondue at home for me because I don’t like to go out to dinner too often, especially on holidays.  He makes the best fondue you guys!! We dip apples, bread, and veg until our tummies are about to bust and then we find room for dessert.

This year, I thought I would try and spice things up with this neon pink and green, cotton candy ribbon cake. It is seven layers of cotton candy goodness, with neon pink ribbon frosting from top to bottom. First rule of thumb when decorating a ribbon cake is that this is totally easier than you think it is going to be. I want to take you guys through it, step-by-step, just to prove to you how simple this cake was to decorate.

DSC01775_600x400

First, take your favorite cake recipe and make 2 8 in. rounds. In this case, I made one electric pink and the other neon green. You can use the basic vanilla cake recipe I have posted before and just half the vanilla with your favorite flavoring. Or in my case, I used the cotton candy flavoring oil at Layer Cake Shop. Use any flavoring oil very sparingly, a few drops is perfect.

Once completely cool (I store mine in the refrigerator for an hour or so) level each cake and then slice each cake in thirds. You can use a cake leveler if you want, but for this cake, I just eyeballed it. You can tell my layers aren’t exactly perfect, but that’s ok with me.  Frost in between each layer with your favorite buttercream, starting and ending with a pink layer.

DSC01781_600x400

Once you have layered and assembled your cake, crumb coat your cake and place back into the fridge for an hour or even overnight. Crumb coating makes it a lot easier to frost a cake because once refrigerated, you don’t have to worry about getting crumbs in your frosting. It also aids in keeping your frosting straight and  level. I normally put mine in the fridge overnight because I just don’t have the time to bake, crumb coat, and frost a cake in an average day.

DSC01790_600x400

I took the last green layer and frosted it for the Hubster to snack on or bring to the office.

Sometimes our furry house elves get a little bite too!

DSC01806_600x400

Take your pastry bag and attach your coupler and tip 103 or any rose tip you have and place the bag into a tall glass. To give it  more of a ribbon candy look, I dripped my electric pink food coloring down the sides of the bag before placing the frosting inside. That way, when I started to pipe the frosting, my ribbons would come out looking like this.

DSC01810_600x400

You want to make sure you are holding your pastry bag vertically against the side of the cake, starting at the bottom, and move in a horizontal 1 inch direction, back and forth. You want to try to keep your lines straight, but it is totally ok if you start to slant like me. You can make it up on the next line of ribbons. Remember, practice makes perfect.

DSC01811_600x400

See! They are much straighter now from this view. Go around the entire cake making 1 inch ribbons from bottom to top.

DSC01814_600x400

Finally, I used a star tip to pipe a small ring of stars around the top to hide any mistakes and to bring together the ribbons with the top of the cake.

DSC01849_600x400

I also added a pink royal icing flower in the middle I had made previously.

DSC01846_600x400

Neony and bright….just ready to be cut into and eaten!

DSC01855_600x400

We ended up splitting one piece between the two of us!

DSC01898_600x400

By the way, this is what the Hubster got me for Valentine’s Day! SQUUUUEEEEE!!!

 Limited Release Disney Couture Ear Hats Kick off the 'Year of the Ear' at Disney Parks

*This is from Disney’s  January 2013 Year of the Ear. They are introducing 5 new limited release Disney Couture Ear Hats each month.