I hope everyone had a lovely Valentine’s Day last week! What did you guys do?
Did anyone have something special planned?
A trip, maybe?
Every year, the Hubster makes cheese fondue at home for me because I don’t like to go out to dinner too often, especially on holidays. He makes the best fondue you guys!! We dip apples, bread, and veg until our tummies are about to bust and then we find room for dessert.
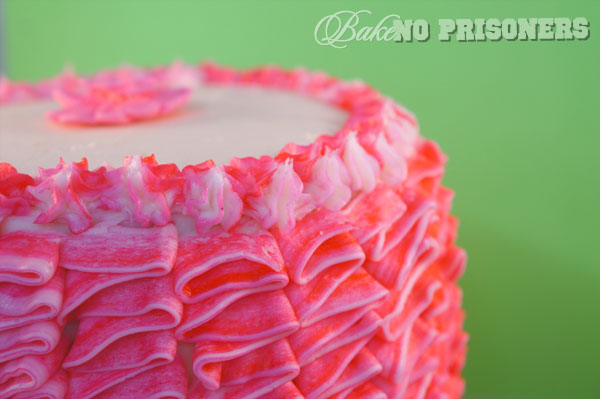
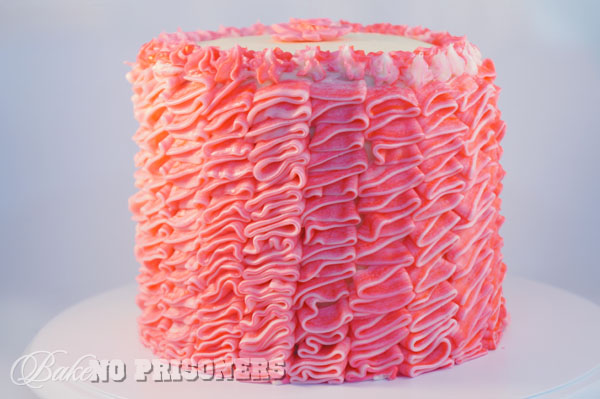
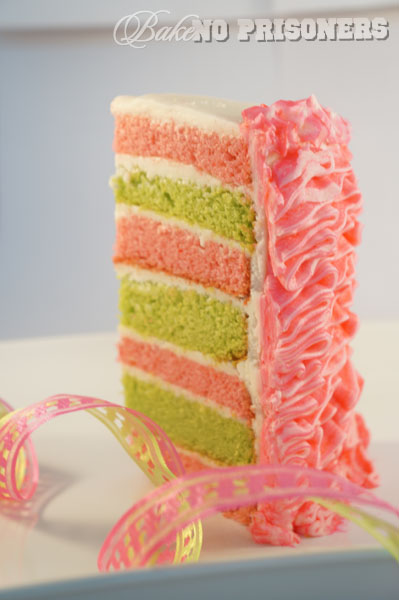
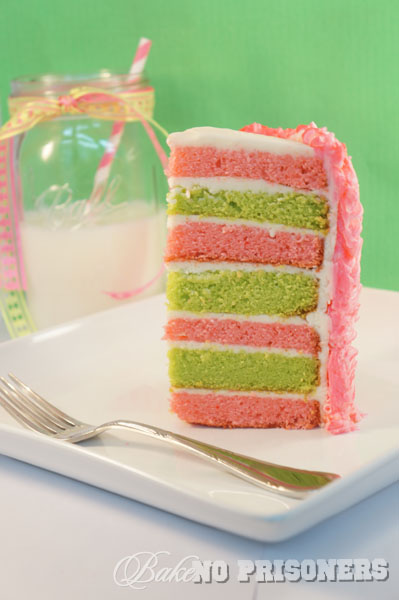
This year, I thought I would try and spice things up with this neon pink and green, cotton candy ribbon cake. It is seven layers of cotton candy goodness, with neon pink ribbon frosting from top to bottom. First rule of thumb when decorating a ribbon cake is that this is totally easier than you think it is going to be. I want to take you guys through it, step-by-step, just to prove to you how simple this cake was to decorate.
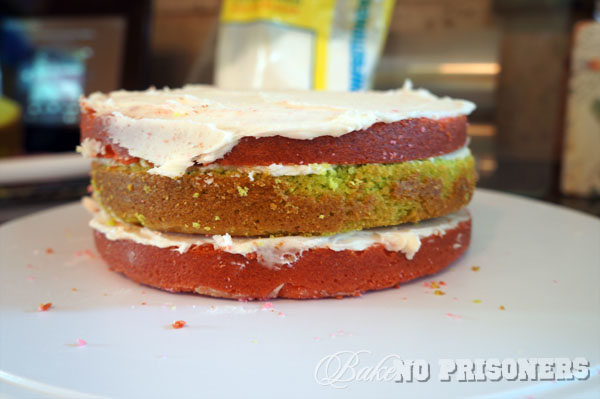
First, take your favorite cake recipe and make 2 8 in. rounds. In this case, I made one electric pink and the other neon green. You can use the basic vanilla cake recipe I have posted before and just half the vanilla with your favorite flavoring. Or in my case, I used the cotton candy flavoring oil at Layer Cake Shop. Use any flavoring oil very sparingly, a few drops is perfect.
Once completely cool (I store mine in the refrigerator for an hour or so) level each cake and then slice each cake in thirds. You can use a cake leveler if you want, but for this cake, I just eyeballed it. You can tell my layers aren’t exactly perfect, but that’s ok with me. Frost in between each layer with your favorite buttercream, starting and ending with a pink layer.
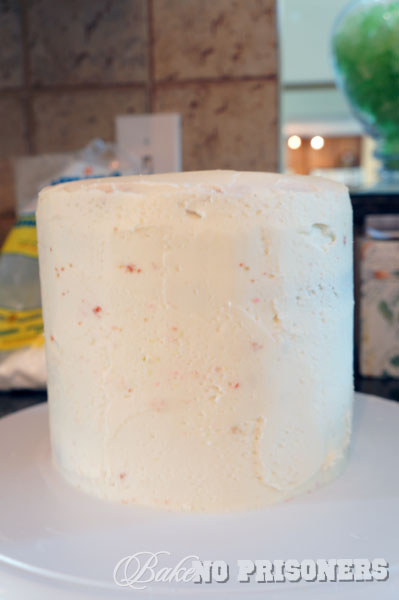
Once you have layered and assembled your cake, crumb coat your cake and place back into the fridge for an hour or even overnight. Crumb coating makes it a lot easier to frost a cake because once refrigerated, you don’t have to worry about getting crumbs in your frosting. It also aids in keeping your frosting straight and level. I normally put mine in the fridge overnight because I just don’t have the time to bake, crumb coat, and frost a cake in an average day.
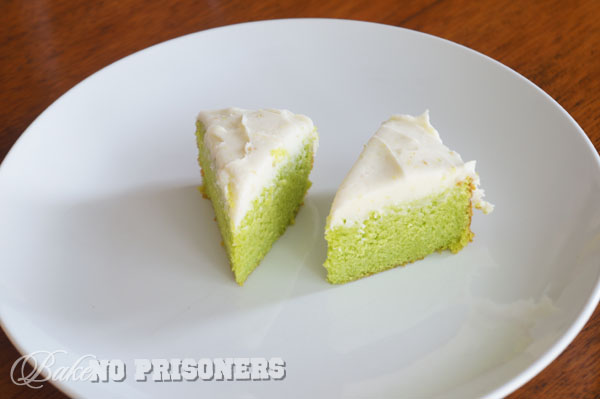
I took the last green layer and frosted it for the Hubster to snack on or bring to the office.
Sometimes our furry house elves get a little bite too!
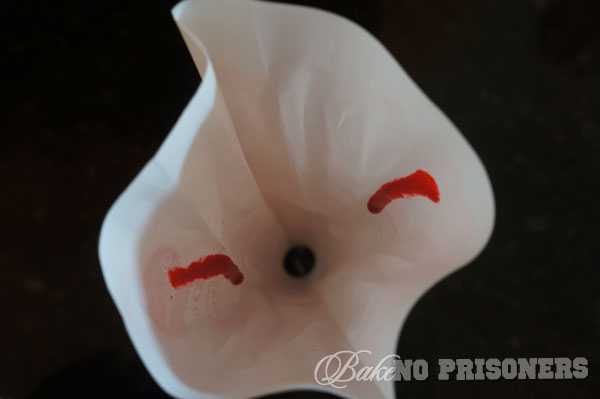
Take your pastry bag and attach your coupler and tip 103 or any rose tip you have and place the bag into a tall glass. To give it more of a ribbon candy look, I dripped my electric pink food coloring down the sides of the bag before placing the frosting inside. That way, when I started to pipe the frosting, my ribbons would come out looking like this.
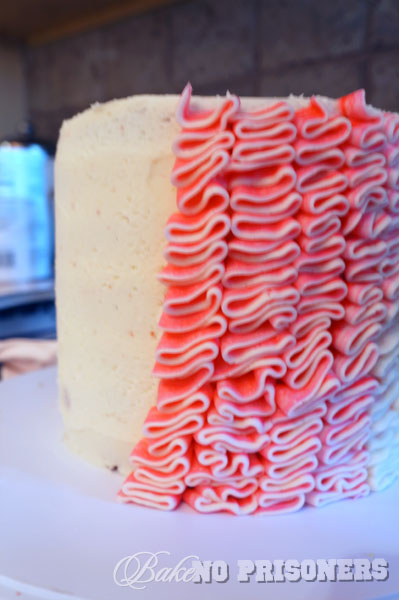
You want to make sure you are holding your pastry bag vertically against the side of the cake, starting at the bottom, and move in a horizontal 1 inch direction, back and forth. You want to try to keep your lines straight, but it is totally ok if you start to slant like me. You can make it up on the next line of ribbons. Remember, practice makes perfect.
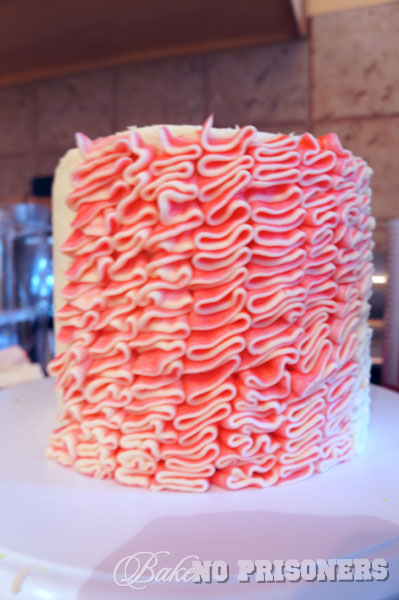
See! They are much straighter now from this view. Go around the entire cake making 1 inch ribbons from bottom to top.
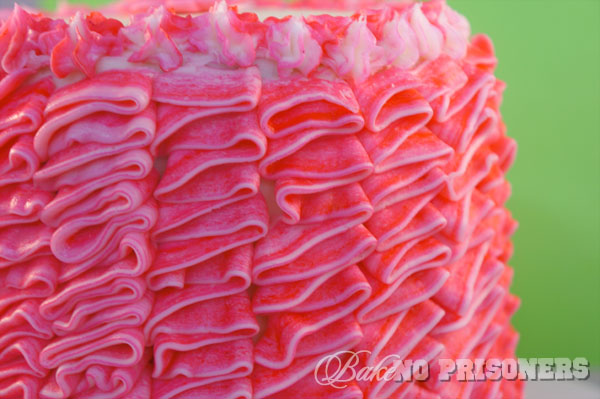
Finally, I used a star tip to pipe a small ring of stars around the top to hide any mistakes and to bring together the ribbons with the top of the cake.

I also added a pink royal icing flower in the middle I had made previously.
Neony and bright….just ready to be cut into and eaten!
We ended up splitting one piece between the two of us!
By the way, this is what the Hubster got me for Valentine’s Day! SQUUUUEEEEE!!!

*This is from Disney’s January 2013 Year of the Ear. They are introducing 5 new limited release Disney Couture Ear Hats each month.