Chocolate Layer Cake with Nutella Frosting

DSC06950_600x400

I recently started working with chocolate transfer sheets. They are totally easy and fun to work with and they have about a bazillion different designs and colors to choose from. The design I choose for this particular cake was a Springy blue and green gingham. Ya know. To make things fun and festive for the season. If you have never worked with them before, rest assured, you can do this. Chocolate transfer sheets are nothing more than strips of acetate that are embellished with cocoa butter. Sound complicated? Keep reading…

DSC06981_600x400

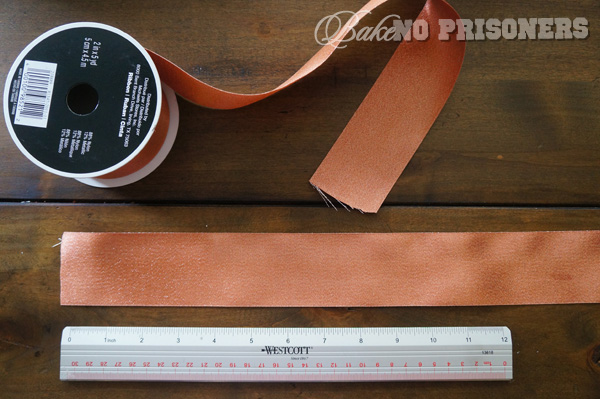
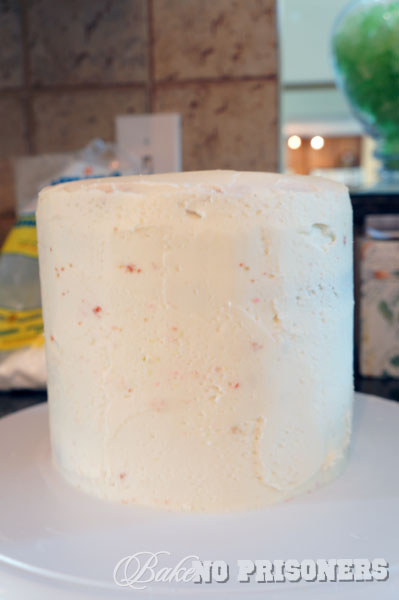
Begin by measuring the height of your cake. I started with a 6 inch round cake, about 4 inches tall. I had already lightly frosted my cake in butter cream, so it was all ready to go. Go ahead and pick up a bag of candy melts, any kind will do, but I like Wilton’s light cocoa, and follow the directions on the bag on how to properly melt them. Now you want your chocolate transfer sheets to be a bit taller than your cake, so when I got to measuring, I made sure to cut my transfer sheets in 4 1/2 inch tall strips. This gave me a little wiggle room when it came to putting it all together.

Place the raised side of your transfer sheets up on a prepared cookie sheet lined with parchment. You can use a small dot of melted chocolate as adhesive to “glue” the transfer sheet to the parchment paper. Don’t worry. It won’t hurt the transfer sheet and it will make the melted chocolate MUCH easier to work with. Gently spread your melted chocolate using an offset spatula to about a 1/8 thickness. Make sure to mark with a knife where your transfer sheet begins and ends.

Let it sit for about 5 minutes and then score it to the desired width. In my case, I scored my chocolate about 2-inches wide. Allow it to sit for a half hour to 45 minutes or until set. Once they are firm, go ahead and peel away the transfer sheets and use the scores you made before to separate your pieces. You may have to do this a few times to have enough pieces to go around your cake.

DSC07001_600x400

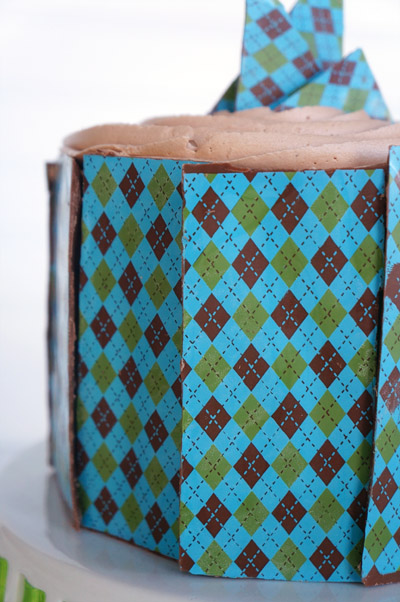
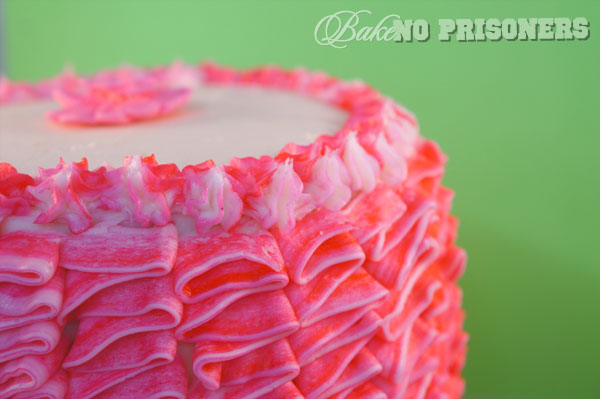
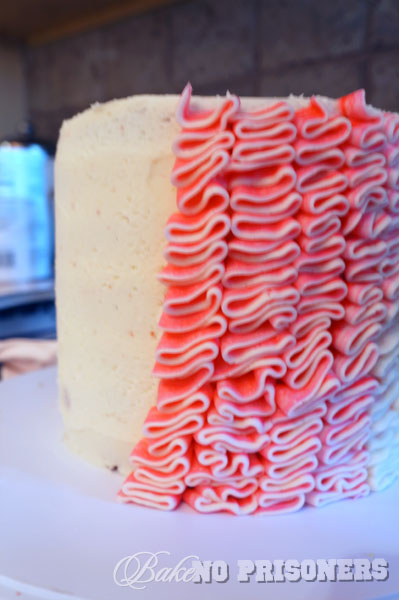
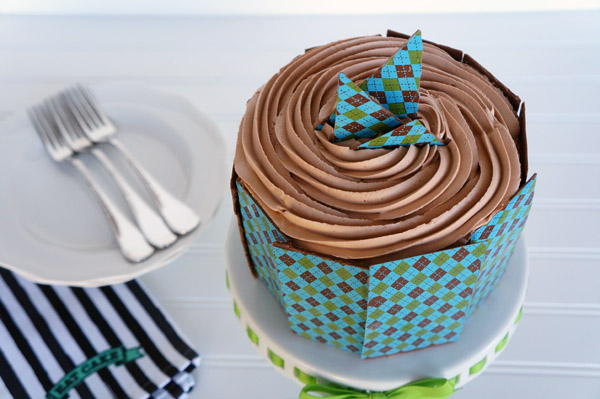
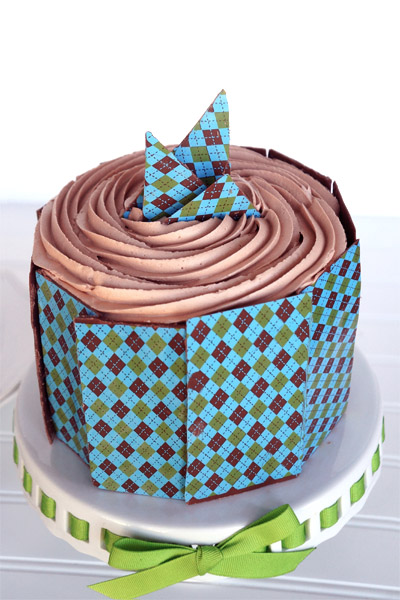
Once I had enough pieces, I overlapped them just a little to add some dimension. If your butter cream is cold or you don’t seem to have enough, just add a little to your transfer sheet to help attach it to the cake. Just be careful because the chocolate can be fragile. You could also wrap a pretty little bow around it to keep it all together as well.

DSC06966_600x400

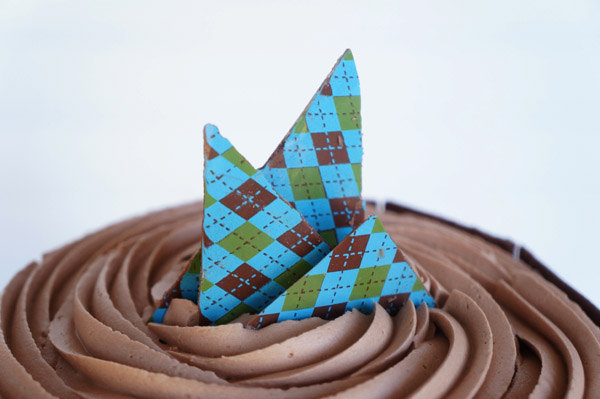
I had some leftover broken pieces, so I decided to create a little topper for my cake as well. All you have to do is carefully cut them into different shapes and place on top. Done and done.

DSC07008_600x400

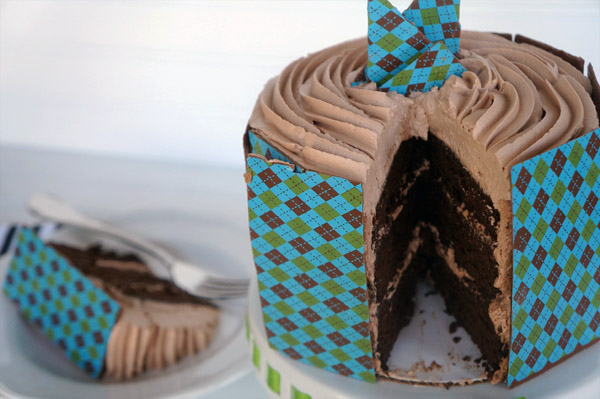
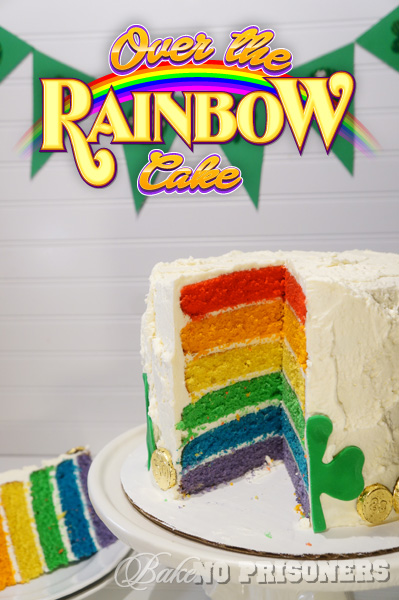
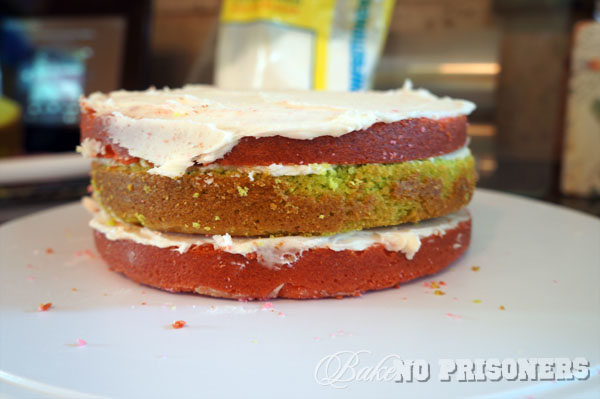
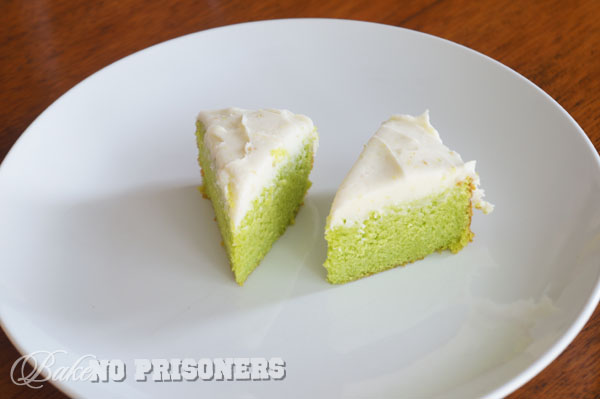
I used my most favorite chocolate cake recipe for this cake and then created a very simple, fluffy Nutella frosting. The Nutella frosting compliments the rich, moist chocolate cake perfectly. I am totally smitten with this cake and could’ve eaten the entire thing by myself. Happy Spring, you guys!

Most favorite Chocolate Cake recipe

Nutella Frosting

3 1/2 cups confectioner sugar

2 sticks{1 cup} unsalted butter, softened

1/2 cup Nutella

5 teaspoons milk

Directions:

In your stand mixer bowl using your paddle attachment, cream butter and slowly add confectioner sugar one cup at a time. Add Nutella and mix well. Add milk, one teaspoon at a time, until desired consistency. Mix on medium-high for 2-3 minutes until light and fluffy.


Over-the-Rainbow Orange Spice Cake {Gold Leaf Tutorial}

Over the Rainbow Orange Spice CakeI don’t know what it is about St. Patrick’s Day that makes me want to drink a tall Guinness and blast a little Flogging Molly, but every time March comes around, I can’t help but get a little giddy. I buy corn beef, slow cook it in Bass Ale and spices, and create a spicy, Guinness sauce to drizzle on top. Then I slap it between two pieces of fresh sourdough and add a little provolone. It is beyoooond amazing. I can’t take credit though. It is totally a Paula Deen recipe I found years ago in a magazine and the Hubster asks for it each and every St. Patty’s Day. And I just can”t help but oblige…wink wink nudge nudge…

But this year, there is a new dessert in town to compliment my oh-so-delicious black and tan sandwich tradition.

Over the Rainbow Orange Spice Cake

The recipe I used to create this 6-layer rainbow cake is actually pretty versatile. You can use it for a traditional vanilla cake, or you can make it more exciting by adding different extracts, spices, and other add-ins. For this cake, I added in a few spoonfuls of orange extract and baking spice to give it a more spice cake flavour. Another option would be to add in orange peel if you happen to have oranges on hand. The icing is a whipped buttercream, again flavoured with orange and vanilla extracts. It is light and fluffy and compliments the cake nicely.

Over the Rainbow Orange Spice Cake

What really makes this cake though is the green fondant clovers and gold leaf coins that decorate the bottom. I kinda see it as the gold at the end of the rainbow, ya know?

Earlier this month, I had ordered a chocolate coin mold on Amazon. I had been wanting to work with edible gold leaf for some time now and these chocolate coins seemed like the perfect opportunity, so I ordered edible gold-leaf too.

If you have never worked with edible gold leaf before, there are a few things you oughta know:

According to About.com Candy:

Definition: Edible gold leaf is a gold product that can be used to decorate food. In candy-making it can be used to cover whole candies like chocolates or truffles, or applied sparingly as a small decorative touch.

Is Gold Leaf Really Edible?

In most cases, yes. Gold is considered “biologically inert,” meaning it passes through the digestive tract without being absorbed. When selecting gold leaf, make sure to get gold that is as pure as possible–this means 22-24 carats. Gold leaf with a smaller carat value has more impurities and is less safe to eat. If you are careful and buy gold leaf that is clearly labeled as “edible” and has 22-24 carats, eating gold leaf is harmless.”

What’s important to remember is that if you plan to use gold-leaf on your cakes or other edible decorations, you need to make sure that your gold-leaf product is at least 22-24 gold carats. The product is usually labelled; you just need to check before ordering.

Edible gold-leaf tutorial

 How to apply gold leaf:

Gold Leaf Tutorial

Before I begin, let me tell you that this was the first time I had ever used gold leaf before and it is just my experience using it. If you have any tips or helpful hints, I am happy to listen!

What you will need:

  • Paper towels
  • 2 dry, small paintbrushes
  • edible gold leaf
  • chocolate coins
  • tweezers{optional}
  • latex gloves{Wearing latex gloves helps to prevent it from sticking to your fingers.}

What to do:

  • Lay down a few sheets of paper towels so that you have a clean workspace for your gold leaf coins.
  • Use tweezers to carefully lift up a small corner of the gold leaf sheet. Once you’ve caught it, use your small paintbrush to pick up the second corner and slide a small piece of the gold leaf onto your chocolate coin or edible decoration.
  • Use the other paintbrush to gently pat and smooth the gold leaf onto the decoration.
  • Continue to smooth out the remaining gaps or bubbles with your paintbrush.
  • Carefully pat down the edges with your paintbrush and remove the excess gold leaf.
  • Carefully place on cake.

Over the Rainbow Orange Spice Cake

Over-the-Rainbow Orange Spice Cake

Yield: 2 8-inch rounds

Recipe by Carrie

Ingredients

  • 1 1/2 cup all purpose flour
  • 1 cup granulated sugar
  • 1 teaspoon baking powder
  • 4 ounces{1 stick} unsalted butter
  • 2 eggs, 2 egg yolks, at room temperature
  • 1/2 cup{4 ounces} milk
  • 2 teaspoons orange extract
  • 1 teaspoon vanilla extract
  • 1 teaspoon baking spice or cinnamon

Instructions

  1. Preheat oven to 350° and line 2 8-inch round pans with parchment paper; spray with flour spray.
  2. In a medium bowl, combine flour, baking powder, and baking spice.
  3. In your stand mixer bowl, beat butter until creamy and fluffy; about 2-3 minutes.
  4. Add your sugar to your butter and beat until combined.
  5. Add your eggs and egg yolks; one at a time.
  6. Pour in your extracts; one at a time and mix well.
  7. Alternating, starting and ending with your dry ingredients, add your dry ingredients and milk.
  8. Mix for about 30 seconds and evenly pour into your prepared pans.
  9. Bake for about 18-20 minutes or until a toothpick inserted comes out clean.
  10. Note In order to make the 6-layer rainbow cake, you will need to triple the recipe and use gel food coloring to color the cakes.
Schema/Recipe SEO Data Markup by ZipList Recipe Plugin
http://www.bakenoprisoners.com/wordpress/index.php/over-the-rainbow-orange-spice-cake/


Autumn Wreath Tutorial

My Mom is a bonafide crafting genius.

When I was 3, she cut out tons of paper Mickey Mouses, just so that she could glue them altogether to make a 3D Mickey Mouse bow for my birthday. See, even then I was obsessed with the Disney.

When the Hubs and I got married, she painted over a hundred glass candle votives with intricate flowers and then attached a hand-cut paper heart that read our names and our wedding date.

And over the years, I have had the opportunity to con, snag, or plead for one of her beautiful handmade, hand-painted wreaths that encompassed a season or holiday. I mean, really, you outta see these things. There like magical.

This year, I thought I could channel my inner crafty and create my own Autumn wreath. I came up with three basic requirements for my wreath. One, I knew it had to be simple, because well, I like simple. Two, it had to have a little glitter. And three, it had to be inexpensive, because the Hubs said so.

So this is what I came up with…

Autumn Wreath Tutorial

 Simple. Glittery. Inexpensive.

Autumn Wreath Tutorial What made this wreath so inexpensive was that I made all of the flowers out of shimmery ribbon. I mean, the total cost was around $21 for the wreath, ribbon, black letter, and one large box of fall potpourri.

Autumn Wreath Tutorial So today, I am going to show you how to make easy ribbon flowers.

Autumn Wreath Tutorial Start by cutting your ribbon anywhere between 12-18 inches in length. Just remember, the longer the ribbon, the bigger the flower.

Autumn Wreath Tutorial Fold your ribbon in half.

Autumn Wreath Tutorial

Then start rolling it into a little bud. This will be the center of your flower and it should be about the size of your thumb nail. Go ahead and secure it with a little dollop of hot glue.

Autumn Wreath Tutorial

To get that rose look, you will want to start folding over the ribbon, securing it with hot glue every few folds.  The hot glue will prevent it from unraveling or coming apart.

Autumn Wreath Tutorial After a few folds, you will begin to see the flower coming together.

Autumn Wreath Tutorial Keep folding and hot gluing.

Autumn Wreath Tutorial Glue the remaining part of the ribbon towards the back of the flower. When you glue it onto the wreath, no one will see it anyway.

Autumn Wreath Tutorial This large box of potpourri was around $4 and made perfect accents for my autumn wreath.

Autumn Wreath Tutorial The black H came already painted and ready to go. The Hubster secured it on with wire and I reinforced it with hot glue.

Autumn Wreath Tutorial

Place your new ribbon flowers, fall potpourri accents, and letter where ever you’d like. You can’t go wrong. Most of all, have fun with it.  I would love to see what you come up with! Send your photos to my Bake No Prisoners Facebook page and I will post them in the next few weeks.

Thomas the Train Cupcake Tutorial

Thomas the Train cupcakes

I like trains.

I am a huge fan.

I often daydream about boarding the Hogwarts Express with Harry, Ron and Hermione, or riding an old steam locomotive and spending the afternoon gazing upon the English countryside, like in some sorta Agatha Christie novel.

Well, this Saturday was E’s 3rd birthday and he wanted a Thomas the Train themed party. So his Mom and I put our heads together and we decided that I would make these adorably cute Thomas the Train cupcakes.

Thomas the Train cupcakes

Since I don’t have small children of my own, I wasn’t sure where to begin, so I scoured the internet for all things Thomas the Train. After a little digging, I found all sorts of ideas to pull from. Not to mention I could tie in all the bits of information I knew about trains as well.

Thomas the Train cupcakes

Thomas was easy enough to put together. I started with the large, medium, and small circle cutters you can find in the baking section at Micheal’s. I rolled out white fondant I had tinted blue, to an 1/8 of an inch and used my large circle cutter to cut out my base.

Thomas the Train cupcakes

To make my black outline, I rolled out black fondant, again to 1/8 of an inch, and used my medium circle cutter. For the the grey Thomas face, I used a small bit of black candy clay(about the size of a dime) I had and mixed it in with a golf ball size of white gum paste. If you do not have candy clay, black fondant would work as well. Using my  small cutter, I cut out his face.

Thomas the Train cupcakes

For his eyes, I used the mini circle cutter and then used this circle cutter for his nose. I found it among the mountainous pile of cookie cutters I currently own. It was the perfect size. After I cut it out, I rolled it between the palm of my hands to form it into a ball. Rolling out the dough and cutting it with the same cutter would ensure that every nose would be the same size.

Thomas the Train cupcakes

To make his smile, I rolled out my fondant and then used my mini circle cutter to cut out additional circles. Then I used the edge of the cutter to cut out a smile from each circle.

Thomas the Train cupcakes

To add the smoke stack, I took my black fondant and cut out 1 inch squares. Using my medium circle cutter, I trimmed one side of the square, so that it would line up with my black outline.

Thomas the Train cupcakes

After I had cut out all the pieces I needed for Thomas, I attached them using a gum paste-water adhesive. If you are not used to working with gum paste, then a little water will work just as well. If you would like a stronger bond, then simply drop tiny bits of gum paste into 2 inches of water and let sit for 10-15 minutes. The gum paste will melt and your water will become cloudy. Use a small brush to stir and apply your adhesive to your fondant pieces and let dry completely.

Thomas the Train cupcakes

I did add a 1/2 in. by 1 in. red horizontal strip with two black vertical stripes along the bottom like Thomas has, but I forgot to take a picture. To add his black eyes and eyebrows, I used an edible black pen by Wilton. Thomas the Train cupcakes

To mixed things up, I also made a Railroad Crossing sign and a set of railroad tracks. For the railroad tracks, I was able to use my new wood imprinting mat to give it a more realistic feel.

Thomas the Train cupcakes

Happy 3rd Birthday E! I hope you had a wonderful day!


Ribbon Cake Tutorial

DSC01813_600x400

I hope everyone had a lovely Valentine’s Day last week! What did you guys do?

Did anyone have something special planned?

A trip, maybe?

Every year, the Hubster makes cheese fondue at home for me because I don’t like to go out to dinner too often, especially on holidays.  He makes the best fondue you guys!! We dip apples, bread, and veg until our tummies are about to bust and then we find room for dessert.

This year, I thought I would try and spice things up with this neon pink and green, cotton candy ribbon cake. It is seven layers of cotton candy goodness, with neon pink ribbon frosting from top to bottom. First rule of thumb when decorating a ribbon cake is that this is totally easier than you think it is going to be. I want to take you guys through it, step-by-step, just to prove to you how simple this cake was to decorate.

DSC01775_600x400

First, take your favorite cake recipe and make 2 8 in. rounds. In this case, I made one electric pink and the other neon green. You can use the basic vanilla cake recipe I have posted before and just half the vanilla with your favorite flavoring. Or in my case, I used the cotton candy flavoring oil at Layer Cake Shop. Use any flavoring oil very sparingly, a few drops is perfect.

Once completely cool (I store mine in the refrigerator for an hour or so) level each cake and then slice each cake in thirds. You can use a cake leveler if you want, but for this cake, I just eyeballed it. You can tell my layers aren’t exactly perfect, but that’s ok with me.  Frost in between each layer with your favorite buttercream, starting and ending with a pink layer.

DSC01781_600x400

Once you have layered and assembled your cake, crumb coat your cake and place back into the fridge for an hour or even overnight. Crumb coating makes it a lot easier to frost a cake because once refrigerated, you don’t have to worry about getting crumbs in your frosting. It also aids in keeping your frosting straight and  level. I normally put mine in the fridge overnight because I just don’t have the time to bake, crumb coat, and frost a cake in an average day.

DSC01790_600x400

I took the last green layer and frosted it for the Hubster to snack on or bring to the office.

Sometimes our furry house elves get a little bite too!

DSC01806_600x400

Take your pastry bag and attach your coupler and tip 103 or any rose tip you have and place the bag into a tall glass. To give it  more of a ribbon candy look, I dripped my electric pink food coloring down the sides of the bag before placing the frosting inside. That way, when I started to pipe the frosting, my ribbons would come out looking like this.

DSC01810_600x400

You want to make sure you are holding your pastry bag vertically against the side of the cake, starting at the bottom, and move in a horizontal 1 inch direction, back and forth. You want to try to keep your lines straight, but it is totally ok if you start to slant like me. You can make it up on the next line of ribbons. Remember, practice makes perfect.

DSC01811_600x400

See! They are much straighter now from this view. Go around the entire cake making 1 inch ribbons from bottom to top.

DSC01814_600x400

Finally, I used a star tip to pipe a small ring of stars around the top to hide any mistakes and to bring together the ribbons with the top of the cake.

DSC01849_600x400

I also added a pink royal icing flower in the middle I had made previously.

DSC01846_600x400

Neony and bright….just ready to be cut into and eaten!

DSC01855_600x400

We ended up splitting one piece between the two of us!

DSC01898_600x400

By the way, this is what the Hubster got me for Valentine’s Day! SQUUUUEEEEE!!!

 Limited Release Disney Couture Ear Hats Kick off the 'Year of the Ear' at Disney Parks

*This is from Disney’s  January 2013 Year of the Ear. They are introducing 5 new limited release Disney Couture Ear Hats each month.