Impromptu Sabbatical and Christmas Cookies

Over the past year or so, I have made an effort to post at least once a week. And for the most part, I have been successful.

However, this year’s Christmas season has totally taken over my life. No kidding.

I am talking hosting Christmas parties. Baking Christmas cookies. Wrapping Christmas presents. Even, singing Christmas carols. {Ok, so that last one was totally just in my kitchen, but still…}

And because of my severe Christmas obsession, I have neglected you. And I am sorry.

But today is Christmas and Christmas is all about love, forgiveness, and cheer. Amiright?

So Happy Christmas! I made you cookies!

Christmas cookies

When I was a little girl, I would watch my Mom bake in the kitchen for days during the holiday season. She would make all kinds of Christmas cookies. Ginger cookies for my brother. Chocolate peanut butter for my Dad. But my favorite were her sugar cookies. She would make a big batch just for me. She would roll them out very thin, cut them out into Christmas trees, stars, stockings, and candy canes, and then my brother and I would frost them.

She would make her own icing too. Mom would whip up several bowls and color them red, yellow, green, and white. We would have sprinkles and colored sugars to decorate on top. And the rule in our house was that if you broke the cookie while frosting it, then you had to eat it. You guys can see where this is going, right? By the time my brother and I were done decorating the cookies, we both had tummy aches due to large amounts of “broken” cookies.” We were so clumsy.. *wink wink*

Christmas cookies
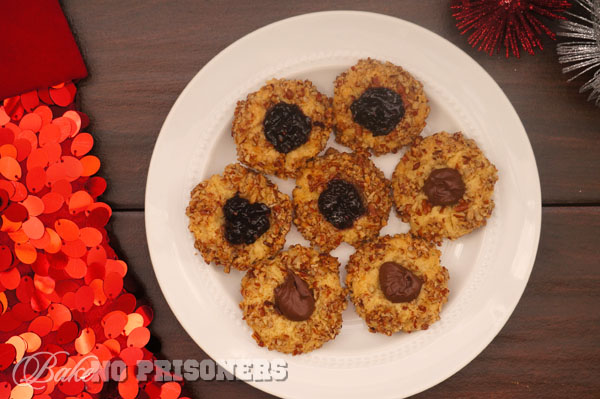
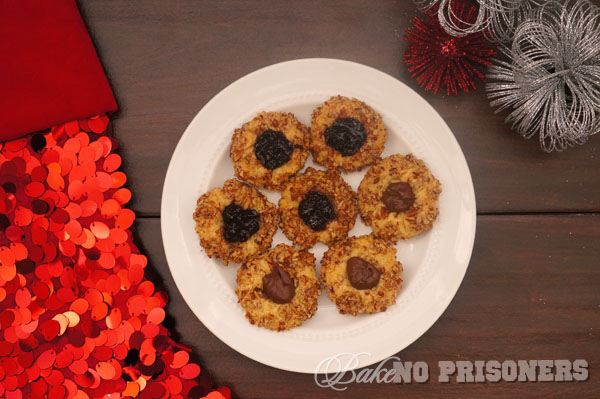
These cookies are known in my family as bird’s nest cookies. My mom says they are my Mama’s{my grandmother’s} mother’s recipe. The same woman that I am named after, so you know they have got to be good. ;) The thing is, these cookies aren’t just for Christmas. You could whip up a batch of these cookies any ol’ day of the year. They have only a few ingredients and are incredible easy to make.

Christmas cookies
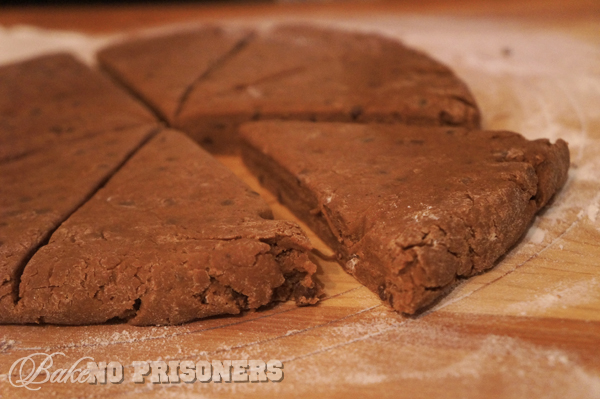
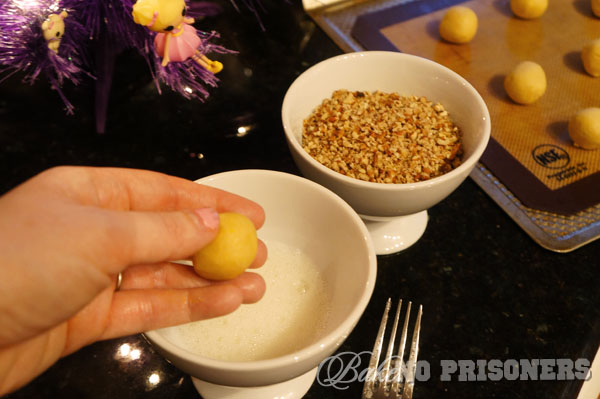
Once you’ve got the dough mixed up, roll about a tablespoon of dough into a circle. Then give it a good egg wash and roll it in crushed pecans. When I do this, I roll out all my dough balls first, and then move on to the egg wash and pecan step. This prevents a big mess to clean up later. I also make sure that my egg wash is good and frothy. I keep a fork handy if I have to whip it up in between cookies.

Christmas cookies
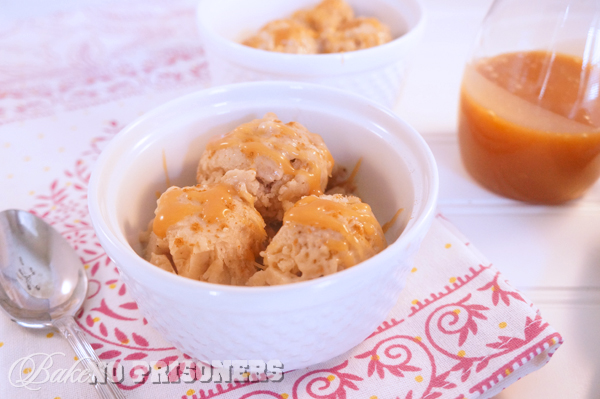
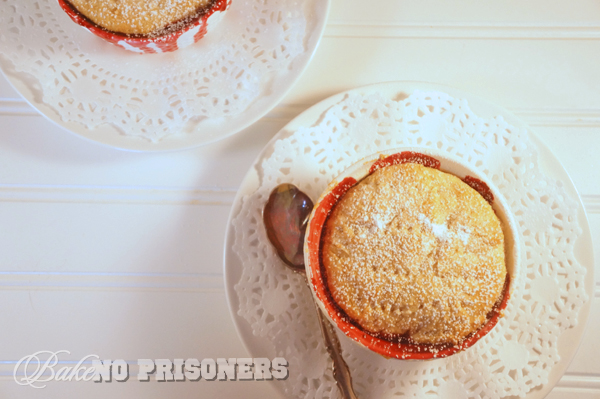
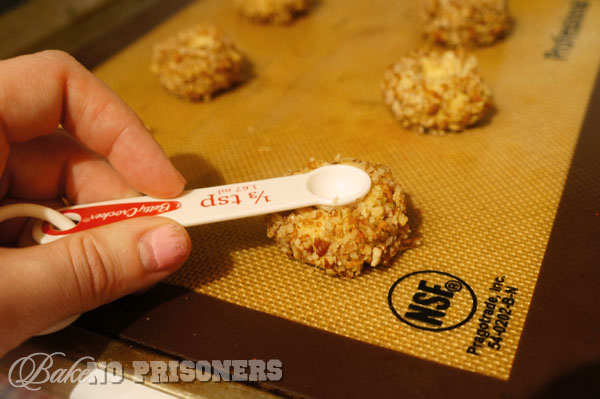
To make the indentations for the nests, I used a small measuring spoon, but you could use the end of a wooden spoon too. You have to do this a few times while they bake to make them stick.

Christmas cookies
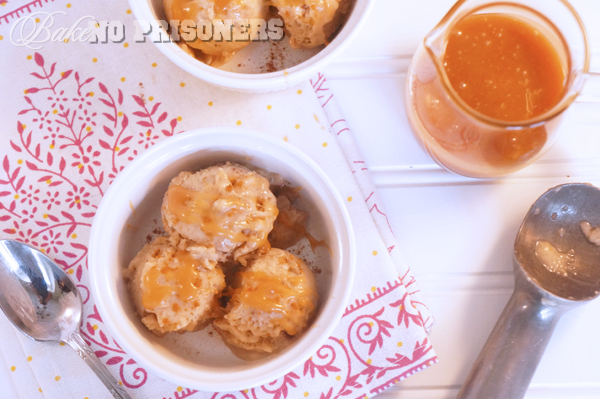
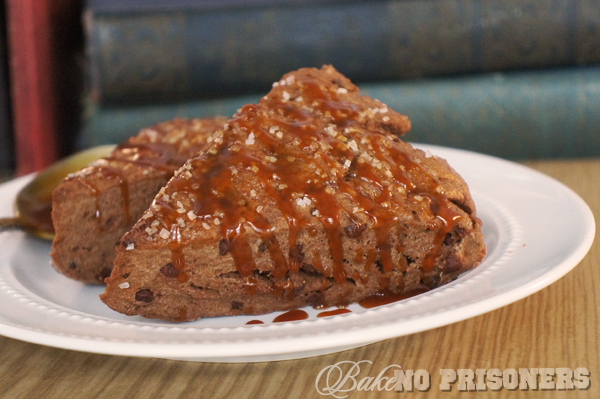
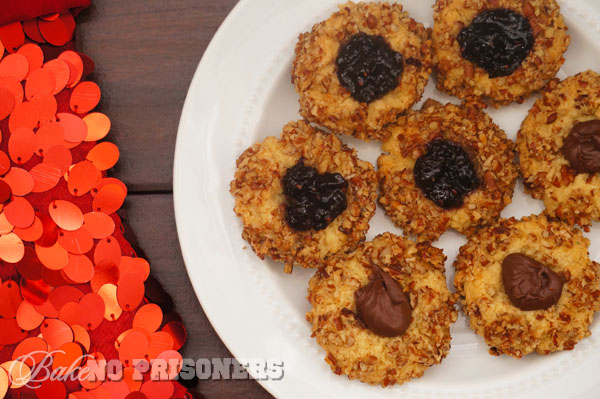
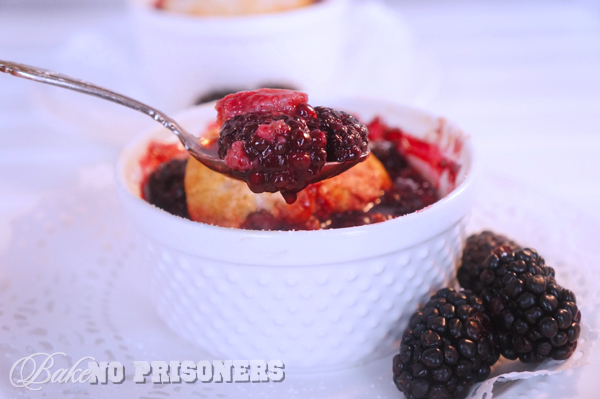
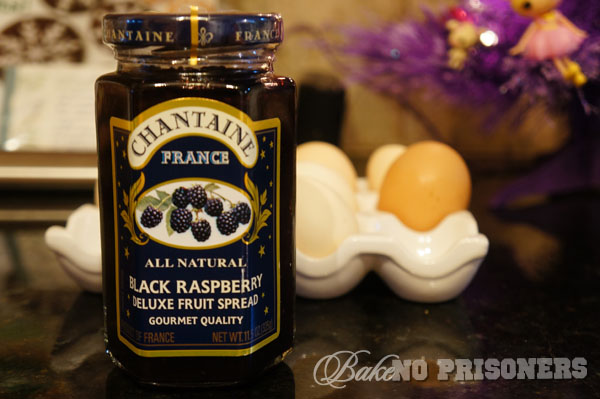
After the cookies have cooled for a minute or two , fill them with your favorite jam, jelly, or fruit spread. You can even fill them with Nutella. I choose to fill half of them with Nutella and the other half with the French black raspberry fruit spread above I received for Christmas.

Christmas cookies

From my kitchen to yours, I wish you the merriest of Christmases and the happiest of holidays!

Bird's Nest Cookies

Yield: 1-1/2 dozen

Recipe by Carrie

Ingredients

  • 1/2 cup {1 stick}unsalted butter
  • 1 egg yolk - save egg white in separate bowl
  • 1/4 cup brown sugar
  • 1 cup all purpose flour
  • 1 cup pecans, coarsely chopped

Instructions

  1. Preheat oven to 350°F.
  2. Cream butter and sugar in your stand mixer bowl.
  3. Add slightly beaten egg yolk.
  4. Add flour until dough forms.
  5. Roll into balls and dip into hand beaten egg white {just beat with a fork until frothy} and roll in finely chopped pecans.
  6. Make an indentation in the center and bake for 8 minutes.
  7. Remove and press centers in again and bake another 10 minutes.
  8. Remove them and indent one more time and fill with your favorite jelly.
Schema/Recipe SEO Data Markup by ZipList Recipe Plugin
http://www.bakenoprisoners.com/wordpress/index.php/impromptu-sabbatical-and-christmas-cookies/

Baby Blackberry Cobblers

Baby Blackerry Cobblers

I love when my Mom comes to visit. She lives about 700 miles away, so when we get to see each other, we try and make the most out of our short visit. She just so happened to fly up this week to help me set up my classroom for the upcoming school year. But thanks to my awesome organizational skills{surprisingly not sarcasm this time}, it only took us one day to set everything up. Which meant that left us 6 whole days to eat, shop, talk, and of course, bake.

Now I have a slight obsession with blackberries, so I already had it in my head that we were going to make a blackberry post, but it was Momma that came up with the cobbler part. We used her ole southern biscuit recipe for the top crust, and I decided to doctor it up a bit with some baking spice. And then, because I don’t like to share all that much, we used baby cobbler cups, so that we could each have our own.

Baby Blackerry Cobblers

Baby Blackberry Cobblers

Ingredients

    For the biscuit:
  • 2 cups all purpose flour
  • 4 teaspoons baking powder
  • 1 teaspoon salt
  • 4 heaping tablespoons granulated sugar
  • 1/4 teaspoon cream of tartar
  • 1 teaspoon baking spice
  • 1/2 cup butter shortening, cold
  • 7/8 cup milk
  • For the blackberry filling:
  • 12 oz. package fresh blackberries
  • 1 cup granulated sugar
  • pinch of baking spice
  • 3 tablespoons cornstarch
  • 1 teaspoon almond extract

Instructions

    For the blackberry filling:
  1. In a medium size bowl, combine blackberries, sugar, baking spice, cornstarch, and almond extract.
  2. Using a large spoon, gently mix together and then mix again every 15 minutes or so to ensure that all the ingredients have been combined.
  3. The filling will need to marinate for about 45 minutes, so now you can get started on the biscuits.
  4. For the biscuit crust:
  5. Preheat oven to 400 degrees and like a cookie sheet with foil.
  6. In a large bowl, combine flour, baking powder, salt, sugar, and cream of tartar.
  7. Using a pastry cutter, cut in your shortening until your flour mixture looks like wet sand and has pea-sized dough bits.
  8. Add most of the milk and mix with a fork; if your dough is still very dry, add the rest of the milk.
  9. Mix only until the ingredients come together; don't overwork your dough.
  10. Pat out your dough on a well floured surface.
  11. Roll out your dough to about a 1/2 inch thickness.
  12. Using your baby-cobbler dish, flip it over and cut out your dough into a circle.
  13. Make sure to use your fork to poke holes in the dough circle before assembly.
  14. To assemble your cobbler:
  15. Fill your baby-cobbler dish all the way to the top with your blackberry filling.
  16. Carefully lay your biscuit crust on top of the filling.
  17. Brush the top of your biscuit with butter and sprinkle with sugar.
  18. Place baby-cobblers on your cookie sheet to prevent dripping.
  19. Bake for 20 minutes and let cool completely before serving.
Schema/Recipe SEO Data Markup by ZipList Recipe Plugin
http://www.bakenoprisoners.com/wordpress/index.php/baby-blackberry-cobblers/

Baby Blackerry Cobblers

Salted Caramel Sauce

Ask anybody who knows me and they will tell you that I like to save money. If I can make it, bake it, or create it, I will do it just to save a few dollars.

Well that includes everything except sewing.

I bought a 1966 Singer at a thrift store a year ago and even went into town to the local sewing shop to sign up for the beginner’s class. The owner of the shop asked me if I could do a few simple beginner steps that everyone should know like threading your own machine, sewing a button, etc. You get the idea. I told her the closest I ever got to sewing something was 8th grade Home Ec. and even then I wasn’t that great. So she told me I would need a beginner’s to beginner’s class. Yeah. I would be the only one in the class. Nevertheless I said yes. She said she would call when she had an opening in her schedule.

She never called.

I never followed up.

I can’t sew.

Buuuuuut, I do try to save money and create with everything else in my life. Like this salted caramel sauce.

Salted Caramel Sauce
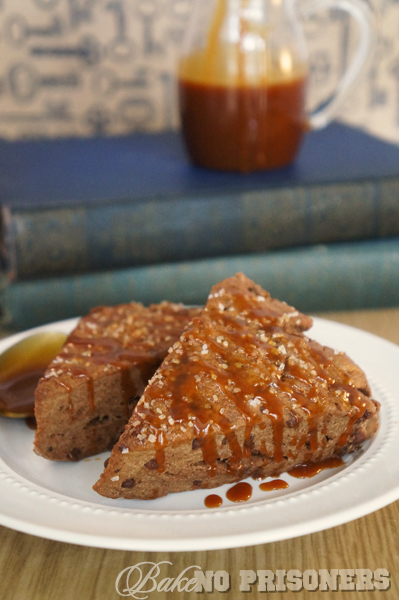
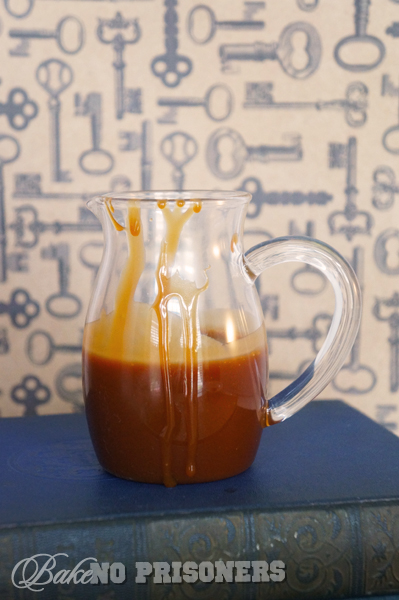
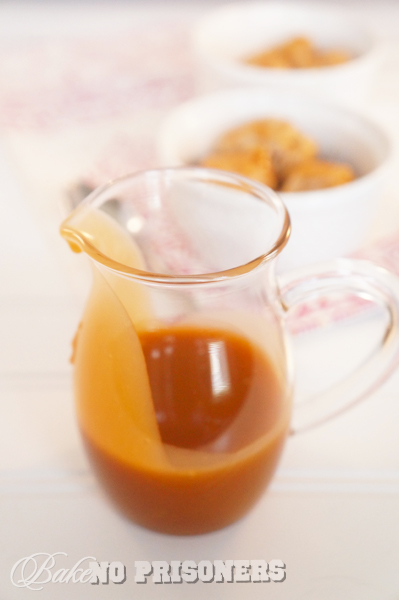
Why pay up to five or six dollars for a jar of caramel sauce when with just a few ingredients and 25 minutes, you have your own, better tasting, no preservatives, salted caramel sauce.

Salted Caramel Sauce

And why stop there? Drizzle it on top of your new-craze-one-ingredient ice cream everyone is talking about these days! I made one-ingredient banana ice cream the other day and just sprinkled cinnamon and drizzled my salted caramel sauce on top for more of a banana’s foster sorta feel.

Salted Caramel Sauce

Salted Caramel Sauce

Ingredients

  • 1 cup granulated sugar
  • 1 tablespoon water
  • 1 tablespoon light corn syrup
  • 5 tablespoons butter, sliced and at room temperature
  • 1/2 cup heavy cream
  • 1 teaspoon fleur de sel
  • 1 teaspoon vanilla

Instructions

  1. Before you begin, measure out all your ingredients and have them ready to use. It is very easy to burn your caramel if you are not prepared.
  2. On medium-high heat, combine sugar, water, and light corn syrup in a 2-3 quart saucepan. Whisk the sugar mixture continuously until it melts completely. It may clump at first, but that is perfectly normal.
  3. Once melted completely, stop whisking and allow the sugar to bubble for several minutes. It will begin to take on a deep amber color. This is what you want. If you are new to making caramel, use a candy thermometer until it reaches 350 degrees.
  4. Slowly and carefully add the butter and whisk until completely melted.
  5. Remove your pan from the heat and slowly pour in your heavy cream while whisking continuously.
  6. Still whisking, add your fleur de sel and vanilla until all the ingredients are incorporated and the caramel is smooth.
  7. Allow the caramel to cool in the saucepan for about 10-15 minutes. This will allow it to thicken up a bit as well.
  8. Carefully transfer your caramel to a glass jar and allow it to cool to room temperature.
  9. Caramel can then be placed in the refrigerator and stored for up to 30 days, but we all know it won't last past the weekend. :)
Schema/Recipe SEO Data Markup by ZipList Recipe Plugin
http://www.bakenoprisoners.com/wordpress/index.php/salted-caramel-sauce/


Buncha Crunch Rice Crispy Treats

When we visited the WWOHP last, the Hubs picked up a treat for me from HoneyDukes as we were leaving. It was an extremely large {it took me several days to eat it} rice crispy treat with a thick layer of chocolate on top. It was definitely delicious, but oh so rich. I could only handle a little at a time.

Since then, I have been thinking a lot about that treat. So when the Hubs asked me to recreate it last week, I was totally into it, but I also wanted to put the ole BNP spin on it.

Whenever we go to the movies lately  I almost always buy either a popcorn and M&M’s or my go-to, Buncha Crunch. And we have been seeing a lot of movies lately, which means Buncha Crunch is on my brain, in my mouth, and around the house. So I thought, why not combine my love for Buncha Crunch with my long lost treat from the WWOHP.

Buncha Cruncha Treats

So not only did I put my beloved Buncha Crunch in the everyday, average rice crispy treat, but I also put them on top…Oh yeah, and I drizzled chocolate and peanut butter on top of that. Because.

Buncha Crunch Treats

Buncha Cruncha Treats

Recipe by Carrie

Ingredients

  • 3 tablespoons butter
  • 1 package {10 oz.} marshmallows
  • 6 cups rice crispy cereal
  • 1 cup Buncha Crunch candy, plus more for topping
  • chocolate drizzle
  • peanut butter drizzle

Instructions

  1. Line a 9x13 inch pan with parchment or grease thoroughly with baking spray to prevent sticking.
  2. In a large saucepan, melt your butter on medium heat.
  3. Add your marshmallows and stir until they are completely melted.
  4. Add your rice crispy cereal, 2 cups at a time, and mix well.
  5. Take your rice crispy mix off of the heat, and stir in your Buncha Crunch. Keep in mind that the longer you stir, the more they will melt. I mixed it as quickly as possible before pouring it in the pan.
  6. Pour your rice crispy mix into prepared pan and using a spatula, press firmly until it is level.
  7. Top with additional Buncha Crunch, and let cool.
  8. To make the chocolate and/or peanut butter drizzle, you will need Candy Melts. You can pick them up at any craft store.
  9. Melt the candy according to the package directions.
  10. Using a disposable piping bag or ziploc bag, pour melts into the bag and snip the end.
  11. Drizzle the rice crispy treats with the chocolate/peanut butter both vertically and horizontally.
Schema/Recipe SEO Data Markup by ZipList Recipe Plugin
http://www.bakenoprisoners.com/wordpress/index.php/buncha-crunch-rice-crispy-treats/

Buncha Crunch Treats

Peachy Crumb Cake

I love me some peaches…Being so deep in the South, we have the best peaches all around us. My most favorite type of peach comes from Georgia. They are so juicy and sweet and I absolutely love to bake with them during the summertime. The Hubs is not the biggest fan of peaches, but he will eat them if they are hidden away in a cake. Soooo…

Might I introduce you to Peachy Crumb Cake. {It kinda sounds like a name…doesn’t it?}

Peachy Crumb Cake

Now technically it is a cake, however it is loaded with everything that screams breakfast food, so if you wanted to eat it, like say around 9am or so, then I would think it would be deemed perfectly acceptable. In fact, I made this cake in the morning and had myself a big piece, so yeah, it is totally breakfast worthy.

Peachy Crumb Cake

The secret to this cake is to use ripe, juicy peaches. I would scour the farmer’s markets or local fruit stands to find them. I was lucky and found mine at Trader Joe’s. If they’re firm, just let them sit out for 24-48 hours. You should be able to smell them and they should feel a bit squishy.

Peachy Crumb Cake

Peachy Crumb Cake

Recipe by Carrie

Ingredients

    For peach filling:
  • 5 ripened peaches, coarsely chopped
  • 2 tablespoons sugar
  • For the cake:
  • 2 cups all purpose flour
  • 1 cup granulated sugar
  • 1 teaspoon baking powder
  • 1 teaspoon baking soda
  • 1/2 teaspoon salt
  • 10 tablespoons {1 1/4 stick} butter, softened
  • 3/4 cup whole milk
  • 1 large egg, room temperature
  • 1 teaspoon vanilla extract
  • For the topping:
  • 1/2 cup pecans, chopped fine
  • 3/4 cup brown sugar, packed
  • 3 tablespoons butter, melted

Instructions

    For the peach filling:
  1. In a medium saucepan on medium low heat, add your chopped peaches and sugar.
  2. Let peaches simmer for about 15-20 minutes or until they have almost broken down. Your filling should be thick with small chunks of peaches.
  3. Set aside and let them cool to room temperature.
  4. For the cake:
  5. Preheat your oven to 350 degrees, making sure your oven rack is in the middle position.
  6. Lightly grease the bottom and sides of a 10-inch springform pan.
  7. In your stand mixer bowl, combine butter and sugar and mix until light and fluffy.
  8. Add egg and vanilla to your butter mixture.
  9. In a separate mixing bowl, whisk flour, baking powder, baking soda, and salt.
  10. Starting with your flour mix first, take turns pouring your flour and milk a little at a time, and ending with the flour mix.
  11. Make sure to scrap the sides and bottom of bowl and mix until combined.
  12. For the topping:
  13. In a small bowl, use a fork to combine pecans, brown sugar, and melt butter.
  14. Putting it all together:
  15. Using a rubber spatula, scrape half of the batter into the prepared pan and smooth the top.
  16. Add your peach filling, making sure to spread it evenly and carefully over the batter.
  17. Add the rest of your batter and smooth the top again.
  18. Sprinkle your brown sugar pecan mixture with a spoon or your hands until it is evenly distributed.
  19. Bake until the center is firm and a tooth pick comes out clean, about 50 minutes.
  20. Transfer the cake to a wire rack and let cool completely before serving.
Schema/Recipe SEO Data Markup by ZipList Recipe Plugin
http://www.bakenoprisoners.com/wordpress/index.php/peachy-crumb-cake/

Peachy Crumb Cake

Chocolate Chocolate-Chip Scones

Sunday marked the Hubster’s 38th birthday. In years past, we have packed up the car and spent his birthday week with family at the beach, however this year we decided to stay back and relax at home. To make his birth week extra special, I came up with a theme for each day leading up to his official birthday. On Monday, the hubs got a few of his favorite king size candy bars with a handmade card that read “You are my king.” Tuesday left him following clues all around the house leading him to a few little geeky gifts. And on Wednesday, I woke up in the wee hours of the morning to make him breakfast in bed…specifically, these decadent Chocolate Chocolate Chip Scones with homemade caramel sauce.

Chocolate Chocolate Chip Scones

During the school year, I am always up and out the door by 6:45 and the Hubster is left to fend for himself for breakfast. So when summertime rolls around, I like to take the time every now and then to make him something extra special to make up for all the months of breakfast drive-thrus and microwavable biscuits.

Chocolate Chocolate Chip Scones

If you’ve got a spare 30 minutes, then you have these rich, delectable chocolate scones. I had already planned to make them, however this recipe is so simple, that I already had everything to make them in my kitchen, so no need for a grocery trip. Bonus.

Chocolate Chocolate Chip Scones

Chocolate Chocolate Chip Scones

Yield: 8 scones

Recipe by Carrie

Ingredients

  • 3 cups flour
  • 1/4 cup cocoa
  • 1 tablespoon + 1 teaspoon baking soda
  • 1 teaspoon baking spice
  • 2 tablespoons castor sugar
  • 1/4 teaspoon salt
  • 2 eggs
  • 3/4 cup whole milk
  • 10 tablespoons {1 1/4 sticks} butter, chilled and cut into 1/2 inch cubes
  • 1/2 cup mini-chocolate chips
  • 1 large egg, beaten well for egg wash
  • Caramel sauce, homemade or store bought {optional}

Instructions

  1. Preheat oven to 425 degrees and line baking sheet with silapat or parchment paper.
  2. In a small bowl, beat 2 eggs and milk; set aside.
  3. In your stand mixing bowl, sift flour, cocoa, baking soda, baking spice, sugar, and salt.
  4. Using your paddle attachment, add butter and mix on medium speed until the mixture looks like the consistency of wet sand; You should only have pea-sized bits of butter.
  5. Using a spatula, fold in the mini-chocolate chips.
  6. On low speed, add your egg-milk mix to your dough mixture until dough just comes together.
  7. Turn out dough onto your well-floured work surface.
  8. Knead your dough just a few times to prevent it from sticking to the surface; do not overwork.
  9. Flour your rolling pin and roll out your dough into a 3/4-inch round.
  10. Using a knife, or better yet, a pizza cutter, slice your dough into 8 slices.
  11. Brush the tops of your slices with the egg wash, making sure not to let it drip down the sides.{This can prevent the dough from rising properly.}
  12. Sprinkle the tops of your scones with sanding sugar.
  13. Place scones in the oven and reduce the temperature to 400 degrees.
  14. Bake for 15-20 minutes and let cool for 10 minutes.
  15. Drizzle with caramel sauce right before serving.
  16. May be served warm and can be stored in an airtight container for 2-3 days.
Schema/Recipe SEO Data Markup by ZipList Recipe Plugin
http://www.bakenoprisoners.com/wordpress/index.php/chocolate-chocolate-chip-scones/

Caramel Sauce


Summery Blue Moon Milkshake

It has been raining for over 14 days here…

14 days…

It is my summer vacation and it has been raining for 1/4 of it. Normally, I love the rain. It is the perfect environment for snuggling with a pup, reading a book, napping with the hubs, or taking on a Harry Potter movie marathon. But now I am over it. OVER IT I SAY.

So I decided to do something about it.

Last week, the hubs was in the mood for a burger, so we took a trip to Red Robin. While he was drooling over which burger to order, I was ogling the drink menu. To be honest, I didn’t make it past the first page. Right there in front of me in glossy card-stock, was a photo of two of my favorite beverages together, intermingled in a tall glass, topped with whipped cream and an orange slice.

I am talking about a beer milkshake here, people. Belgian-style Blue Moon Ale paired with a citrus inspired-vanilla milkshake.

I know what you are thinking….but stop right there.

This milkshake was absolutely delightful and refreshing and I just knew I had to recreate it at home to cure my rainy day blues.

DSC04505_Retouchedps

Thanks to the ad, I already knew that the Red Robin milkshake not only had Blue Moon and vanilla ice cream, but orange liquor as well. So I decided to play up on the orange flavor and add Triple Sec to mine. I also decided to add a little orange juice and orange extract to take some of the bitter taste away from the Blue Moon. And to top off my milkshake, I whipped up a batch of orange flavored whip cream and added an orange slice. {Because every frothy alcoholic milkshake needs a fruit slice.} Am I right? Or am I right?

DSC04574_Retouchedps

This was the perfect remedy for my rainy summer blues. It is like bright, shiny summertime in a cup. It totally makes me forget about the  soggy atmosphere outside my window.

Summery Blue Moon Milkshake

Recipe by Carrie

Ingredients

  • 1 cup Blue Moon Ale or any other orange flavored beer
  • 1/2 cup orange juice
  • 1 1/2 shots Triple Sec
  • 1 teaspoon orange extract
  • 6-8 scoops vanilla ice cream
  • For the orange whipped cream:
  • 1/2 cup heavy cream
  • 4 tablespoons confectioners sugar
  • 1 teaspoon orange extract

Instructions

  1. In a 72 oz. blender pitcher, combine Blue Moon beer, orange juice, Triple Sec, orange extract, and ice cream. Blend until desired consistency.
  2. Add additional scoops of ice cream depending on how you like your milkshake thickness. This recipe call for 6-8, which is of light-medium consistency.
  3. For the orange whipped cream: Combine heavy cream, sugar, and orange extract in your stand mixer bowl. Using your whisk attachment, whisk the cream mixture on medium-high until stiff peaks form.
Schema/Recipe SEO Data Markup by ZipList Recipe Plugin
http://www.bakenoprisoners.com/wordpress/index.php/summery-blue-moon-milkshake/

DSC04568_Retouchedps


5 Things

When my sweet friend over at Polka Dot Skies did a “5 interesting things you may not know about me” post and then encouraged us to play along, I couldn’t help but join in the fun, so here goes…

#1 I recently became a vegetarian

I take issue with all the inhumane ways animals are slaughtered for meat production and find all the growth hormones and other chemicals  extremely unhealthy, so I decided to forgo all cattle, pork, and poultry products. On rare occasion, I will eat fish and shellfish, but I do my very best to make sure they are wild caught and fresh. I encourage all meat eaters on the fence about joining us veg heads to read Eating Animals by Jonathan Safran Foer.

#2 I LOVE audiobooks

I am an ferocious reader, but I am obsessed with audiobooks. I have one in the car {Michael Crichton – State of Fear} and one on my laptop to take with me when I am getting ready in the morning or baking or even cleaning around the house {Diana Gabaldon – Dragonfly in Amber.} I have also started Ken Follett’s Fall of Giants for light summer reading.

outlander

#3 I am a total N-E-R-D

Ok, this might not be such a surprise, but it is definitely worth noting. I am obsessed with Harry Potter, Doctor Who, Game of Thrones, The Walking Dead, Star Trek, Star Wars, really anything with stars in it, Lord of the Rings, and Firefly. I am positive there is more, but you get the idea. I even designed my dining room to look like something right out of Hogwarts and I also have my own Honeydukes display.

#4 Mario Kart Master

Several of my weeknights are consumed with playing Mario Kart Wii with my brother and father. I live in NC, while they are in Florida, so we connect via the Wii online network. It is a great bonding experience and we get to catch up with each other about how our week has been.

Peach

#5 The Element Song by Tom Lehrer

A few years back, I proposed a contest to my fourth grade class…memorize the infamous Elements Song by Tom Lehrer and win a cupcake courtesy of me. Of course, I couldn’t expect them to memorize it if I hadn’t, so I spent several weeks practicing. To this day, I can sing all the Elements {except for the 15 discovered after the song was created.} FYI, so can Daniel Radcliffe. ;)

Tom Lehrer

Bonus fact: I was fortunate to have Little Polka Dot, Polka Dot Skies’ daughter, in my class not just for first grade, but also for second. She was and still is such an amazing girl!

Do you want to play along? I would love to know what 5 interesting facts you have to share! Please let me know if you would like to participate and I will officially tag you!

Thomas the Train Cupcake Tutorial

Thomas the Train cupcakes

I like trains.

I am a huge fan.

I often daydream about boarding the Hogwarts Express with Harry, Ron and Hermione, or riding an old steam locomotive and spending the afternoon gazing upon the English countryside, like in some sorta Agatha Christie novel.

Well, this Saturday was E’s 3rd birthday and he wanted a Thomas the Train themed party. So his Mom and I put our heads together and we decided that I would make these adorably cute Thomas the Train cupcakes.

Thomas the Train cupcakes

Since I don’t have small children of my own, I wasn’t sure where to begin, so I scoured the internet for all things Thomas the Train. After a little digging, I found all sorts of ideas to pull from. Not to mention I could tie in all the bits of information I knew about trains as well.

Thomas the Train cupcakes

Thomas was easy enough to put together. I started with the large, medium, and small circle cutters you can find in the baking section at Micheal’s. I rolled out white fondant I had tinted blue, to an 1/8 of an inch and used my large circle cutter to cut out my base.

Thomas the Train cupcakes

To make my black outline, I rolled out black fondant, again to 1/8 of an inch, and used my medium circle cutter. For the the grey Thomas face, I used a small bit of black candy clay(about the size of a dime) I had and mixed it in with a golf ball size of white gum paste. If you do not have candy clay, black fondant would work as well. Using my  small cutter, I cut out his face.

Thomas the Train cupcakes

For his eyes, I used the mini circle cutter and then used this circle cutter for his nose. I found it among the mountainous pile of cookie cutters I currently own. It was the perfect size. After I cut it out, I rolled it between the palm of my hands to form it into a ball. Rolling out the dough and cutting it with the same cutter would ensure that every nose would be the same size.

Thomas the Train cupcakes

To make his smile, I rolled out my fondant and then used my mini circle cutter to cut out additional circles. Then I used the edge of the cutter to cut out a smile from each circle.

Thomas the Train cupcakes

To add the smoke stack, I took my black fondant and cut out 1 inch squares. Using my medium circle cutter, I trimmed one side of the square, so that it would line up with my black outline.

Thomas the Train cupcakes

After I had cut out all the pieces I needed for Thomas, I attached them using a gum paste-water adhesive. If you are not used to working with gum paste, then a little water will work just as well. If you would like a stronger bond, then simply drop tiny bits of gum paste into 2 inches of water and let sit for 10-15 minutes. The gum paste will melt and your water will become cloudy. Use a small brush to stir and apply your adhesive to your fondant pieces and let dry completely.

Thomas the Train cupcakes

I did add a 1/2 in. by 1 in. red horizontal strip with two black vertical stripes along the bottom like Thomas has, but I forgot to take a picture. To add his black eyes and eyebrows, I used an edible black pen by Wilton. Thomas the Train cupcakes

To mixed things up, I also made a Railroad Crossing sign and a set of railroad tracks. For the railroad tracks, I was able to use my new wood imprinting mat to give it a more realistic feel.

Thomas the Train cupcakes

Happy 3rd Birthday E! I hope you had a wonderful day!