No-Better-Way-to-Say-I-Love-You Cookies

DSC06715ps

I have been on a bit of a cookie kick lately, but I just can’t seem to help myself.

It is like my New Years cookies sparked a whole new world filled with different flavors, icings, and add-ins.

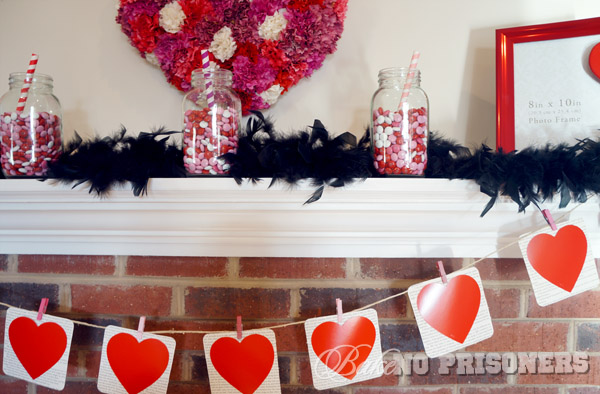
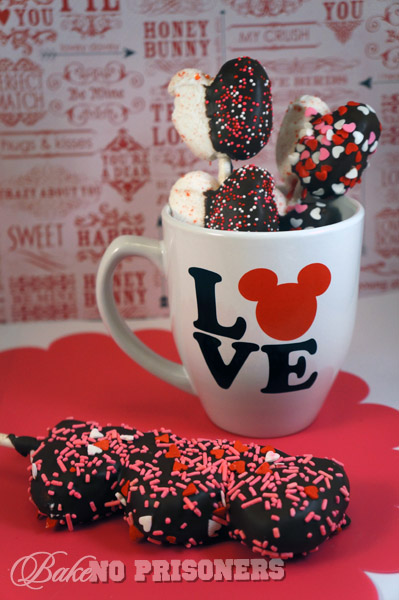
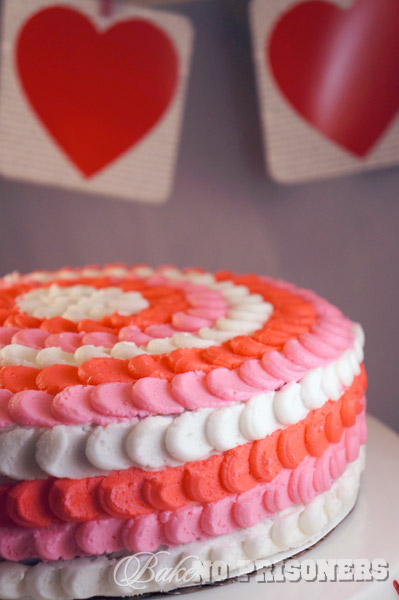
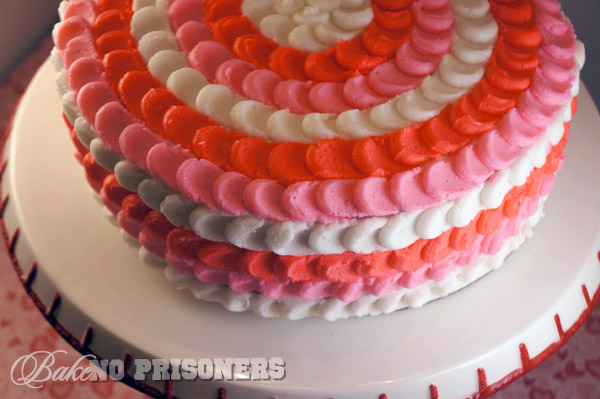
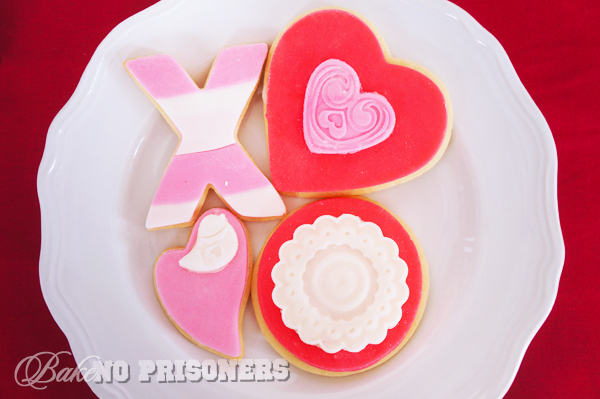
And with Valentine’s Day just around the corner, I just couldn’t wait to come up with something new to show you guys how much you are loved.

The Hubs and I don’t really partake in the whole Valentine’s Day celebration. We might give each other a card. Maybe go out to dinner. Say a million I-love-you’s throughout the day, but that’s pretty much normal, every day life for us. But this year, I plan on making him dinner{with meat..I am a vegetarian} and I have hinted around that I would love to be wearing this as a little token of his affection.

mickeybracelet

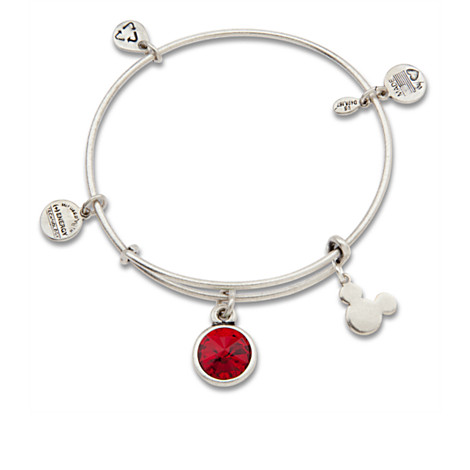
It is the Mickey Mouse Birthstone Bangle by Alex and Ani and I am quite enamored. I am so obsessed, that I actually want the red July birthstone instead of my pink June birthstone because it looks way more Disney to me. Don’tcha think? #totaldizgeek

DSC06744ps

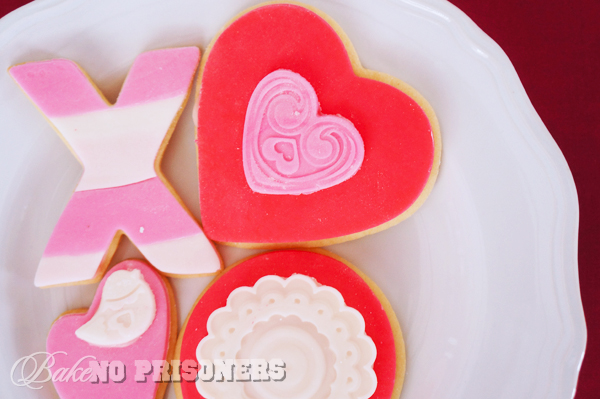
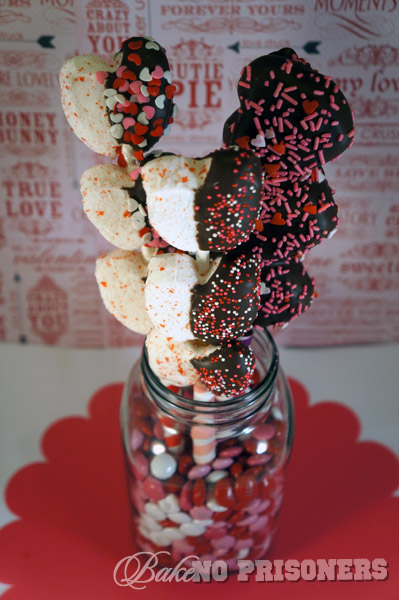
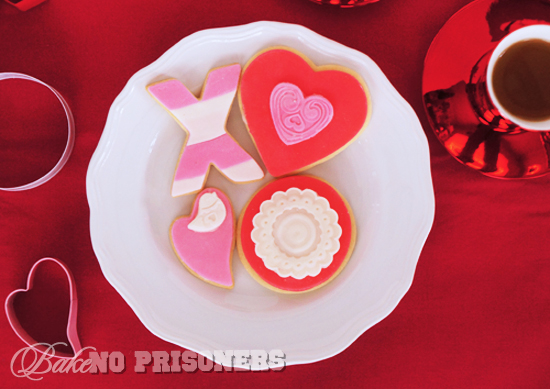
I think my favorite part about these cookies was how easy they were to put together. No, seriously. I plan on writing up a tutorial post on all the how-tos of these cookies, but for now, I will break it down to the bare essentials.

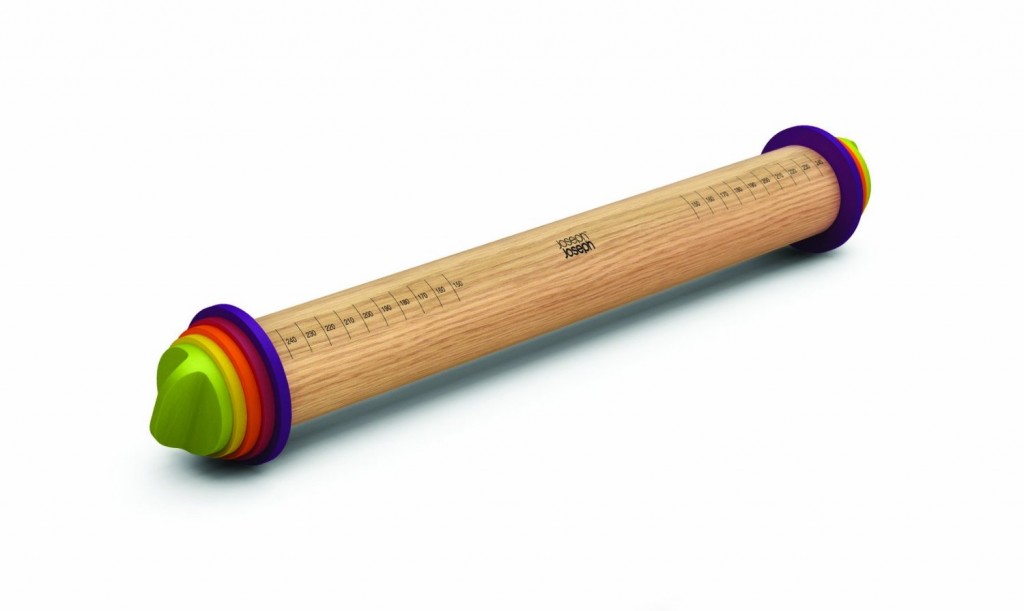
To begin with, I used my basic sugar cookie recipe to create my valentine cookies. The Hubs had bought me an adjustable rolling pin {see below}a few weeks back and it is truly one of my very favorite tools in my kitchen. Not only does it help in making sure my cookies are all the same width, but because of that, they bake more evenly. I like my cookies on the thin side, so I used the 1/16 disc to roll out my dough, but it also comes with 1/6, 1/4, and 3/8-inch removable discs as well.

pin

Once baked and cooled, I came up with a faux royal icing to “glue” on my fondant. Just spread a small amount onto the cookies and then carefully lay your fondant on top. It takes only a few minutes to make, but is much easier to decorate with and tastes great. Simply mix all the ingredients together in your stand mixer bowl. Fast. Easy. And it doesn’t dry out like real royal icing.

I had decided to use a homemade marshmallow fondant recipe I found, rather than spending up to $20 on store bought fondant. I don’t necessary like the taste of store bought fondant and in my opinion, it doesn’t last as long. Homemade fondant is fluffy, sweet, and stays soft on top of your cookies. Like a little marshamllow-y cloud of goodness.

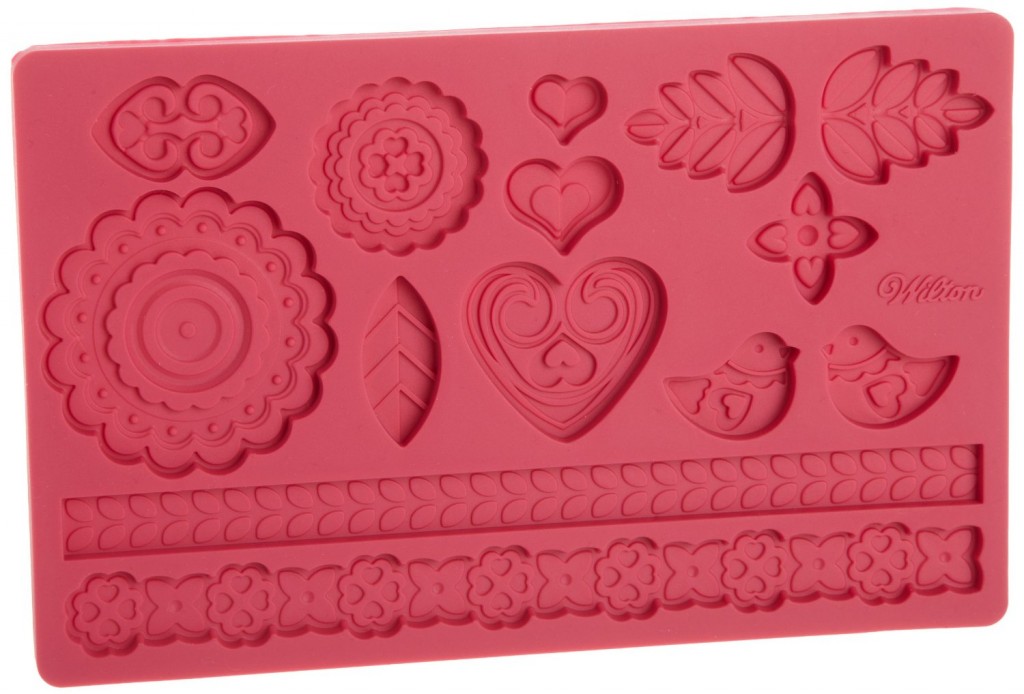
To create the fondant patterns, I used the following mold below. They are really easy to use. Just dust the mold with confectioners sugar and carefully roll a small amount of fondant onto the desired design until thin and then peel away the excess. I also used a small fondant tool to smooth out my edges as well.

mold

I promise the hardest thing about these cookies was taking photos of them. We are in the midst of a “snow storm” here in the south and everything is so dark and dreary. Sounds like the perfect opportunity for a hot cuppa and a good book.

No-Better-Way-to-Say-I-Love-You Cookies

 Recipes and Resources

Basic Sugar Cookie Recipe

Marshmallow Fondant

Faux Royal Icing:

2 cups confectioners sugar

1/2 teaspoon vanilla

8 tablespoons heavy cream

*You can add more cream for a thinner icing or use less if you like a thicker icing.

Warning: Valentine Fabulousity

I have got so much going on for you guys in this post that I might just explode with excitement!!

First off, let me tell you that I am not your average valentine.

I don’t like flowers.

I don’t do expensive jewelry.

I don’t even like to go out to dinner.

Weird? I know. But in our house, we like to make each other something to celebrate Valentine’s Day.

(Supposedly the hubster is secretly working on a glowing Doctor Who sign for me…SQUEEE!! What else could a girl possibly want?!)

So I have made you guys something fabulous to show how much you are loved!

Lovey Mantels

DSC01662_600x400

This year I noticed several blogs out there decorating their mantels for the day of L-O-V-E. Amanda Jane Brown was probably my favorite and she gave me a ton of ideas and inspiration for my own mantle. I plan to fill the red picture frame with a valentine print from the awesome Becky Higgins.

DSC01704_600x400

I adored Amanda’s idea of valentine M&M’s in mason jars and I added a junky striped straw to mine to give them a bit more whimsy.

I also love the mustache epidemic that is spreading across the nation. Anybody else? I especially love my hanging heart in the background with its little black handlebar mustache. I think it ties in nicely with the black feather boa that is draped across the mantle.

DSC01650_600x400

I used my apothecary jar to hold the leftover pink and white marshmallows I had after I topped my triple chocolate brownies with them.

For the wreath, I cut a heart out of Styrofoam and hot glued artificial carnations in various shades of red, pink, purple, and white. I also secured some pretty ribbon in the back, so I could hang it up.

DSC01653_600x400

This heart banner was so quick and simple to put together. I found the hearts, twine, and mini-clothes pins at my local craft store. For the background, I just ripped out pages from an old book, trimmed them up, and round the corners. Then I just glued the hearts in the center of the book page and hung them up.

Chocolate Covered Peep Hearts

DSC01508_600x400

You heard me right….I found heart shaped, vanilla Peeps, dipped them in milk chocolate, and sprinkled them with love.

From me. Just for you.

DSC01503_600x400

Don’t you LOVE my new Mickey coffee mug?!?!?! Ahhhhh… I die.

Triple Chocolate Marshmallow Brownies

DSC01475_600x400

Chocolate is the only tradition I keep when it comes to Valentine’s Day…and these brownies are diabolical…choco-magical if you will…and I am totally quoting someone who recently ate these when I say this.

Triple Chocolate Marshmallow Brownies

Recipe by Carrie

Ingredients

  • 3 ounces semisweet chocolate
  • 2 ounces bittersweet chocolate
  • 2 ounces unsweetened chocolate
  • 3 tablespoons cocoa powder
  • 1 stick butter, softened, cut into quarters
  • 3 large eggs, room temperature
  • 1 1/4 cups sugar
  • 2 teaspoons vanilla extract
  • 1/2 teaspoon salt
  • 1 cup all purpose flour

Instructions

  1. 1. Preheat oven to 350 degrees. Spray an 8 in. pan with nonstick cooking spray and line with 2 sheets parchment paper perpendicular to one another. Push paper down into the corners, but allow it to hang over the sides.
  2. 2. In a double boiler, melt all chocolates and butter until smooth. Whisk in the cocoa until blended. Set aside to cool.
  3. 3. Combine the eggs, sugar, vanilla, and salt in your free standing mixer for 30 seconds. Add the chocolate mixture into the egg mixture until incorporated.
  4. 4. Add the flour in two batches until just blended.
  5. 5. Pour the mixture into the prepare pan and spread evenly into the corners.
  6. 6. Bake until slightly puffed and when a toothpick inserted comes out with a few sticky crumbs, about 35-40 minutes.
  7. 7. If adding marshmallows, take out at 30 minutes, add marshmallows, and bake for an additional 5 minutes or until marshmallows have puffed up.
Schema/Recipe SEO Data Markup by ZipList Recipe Plugin
http://www.bakenoprisoners.com/wordpress/index.php/warning-valentine-fabulousity/

DSC01496_600x400

As a teacher, it is my academic duty to be totally up to date on all the latest toys, dolls, and video games(at least, that is what I tell myself when I am perusing the toy department)…..soooo my mini lalaloopsy doll just had to make an appearance on the blog.

Happy 2nd Birthday, Bake No Prisoners!

DSC01387_600x400

This week marks the 2nd blogiversary of Bake No Prisoners!

And what better way to celebrate than with this beautiful Valentine Petal Cake and our new look!

To be honest, when Bake No Prisoners started, I really didn’t know what I was in for. At the time, I enjoyed cooking and baking for family and I loved to spend hours surfing the net for inspiring blogs and recipes. I had no real photography skills, nor did I know the first thing when it came to blogging. I just knew that I loved to bake and write…and so once I hit publish on that first post, life as I knew it was over.

Ok…I am being a bit dramatic, but if you look at the big picture from my end, you can see how much I have grown as a baker, a blogger, a photographer, and foodie friend.

I never really started baking until I got married. I come from a long line of amazing women who are self taught bakers and chefs, but I never took the time to hone in on their skills until my early 20′s. My grandmother was known for her apple pies and perfect, flaky crust, for which my Mom says I have surpassed her skills. My Mom is required, not asked, to make several different types of Christmas cookies each year to satisfy the lot of us and it usually takes her weeks to complete this daunting task. And yes, Mom, we are all eternally grateful. And then there’s me. I had a lot of catching up to do and this blog helps me reach my never ending goals.

DSC01403_600x400

As a child, instead of baking, I loved to write. I wrote all the time. Short stories. Poems. Fictional alien narratives that won me awards. I envisioned myself as an author or a journalist of some kind. But as time went on, my passion to write succumbed to my passion for teaching. I have this keen ability to relate to children. Maybe it is because I am still a child at heart, but I like the shows they like (hence my current obsession with Dance Academy), I like the same music, and I am quite the fan of video games. I also have a deep love affair with learning. And I love to pass on that need to learn to my students. This blog allows me to do both….write and learn. I learn new things with every post about Word Press or blogging techniques. I have also learned that posts are not just about the recipes…You have to give a little of yourself to your posts, and readers alike.

DSC01394_600x400

Last year for my birthday, we all went out to the best restaurant in town. It was great. I ordered the duck. My husband brought the annual cookie cake…double stuffed. The whole family was there. My favorite part? My in-laws had purchased me a photo box for my food photography. This changed my photos indefinitely. This meant that they took my blog seriously. Even more…the following month, the hubster bought me my own Sony NEX-5N. Over the past year, I have grown as a photographer. I now know the lighting needed for a certain photo or what background would enhance the picture. I still have a lot to learn, but I am getting better each day. Now if I could only master Photoshop….UGH!

DSC01389_600x400

This last part of my post is most important.

Friends.

Throughout this process I have had so much support from my old friends, positive feedback from my new friends, and am encouraged and excited about the friends to come. I cannot tell you how happy it makes me when someone likes my Facebook page, or follows me on Twitter. And I get super duper pumped up when you leave a comment. It can be pretty scary when you put your ideas, thoughts, and feelings out there for everyone to see, but you make me feel inspired to do it. Thank you to all my friends, old and new, and friends yet to come.

Happy 2nd Blogiversary, Bake No Prisoners! Now have a slice of the bloody cake!

DSC01419_600x400

Recipe info: Basic Vanilla Cake

*I substituted half the vanilla extract for almond extract

Amazing tutorial on the Petal cake decorating technique can be found here: The Hungry Housewife