The Daring Baker’s Challenge: Mille-feuille/Napoleon

Our October 2012 Daring Bakers’ challenge was hosted by Suz of Serenely Full. Suz challenged us to not only tackle buttery and flaky puff pastry, but then take it step further and create a sinfully delicious Mille Feuille dessert with it!

Now I am NOT one for messing around with puff pastry. In fact, I almost didn’t tackle this month’s challenge because frankly, it looked too difficult and took up way too much time for me. But when it came down to it, my simple stubbornness got in the way and I decided to take on the evil that is puff pastry this past weekend.

The first thing I did was make sure I had all the ingredients on hand  to pull off this month’s task. I tend to bake on Saturday mornings while everyone is still asleep and there is nothing I hate more than having to get out of my jammies and get dressed before 11am just to go pick up a gallon of milk or package of butter at the grocery store. So after finding out I had everything on hand, there were no more excuses as to why I shouldn’t at least try it.

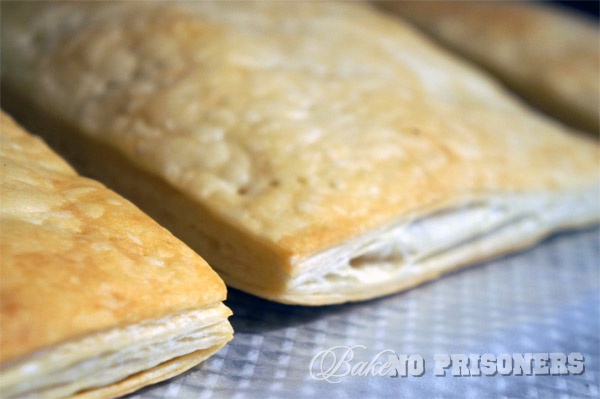
The puff pastry itself, took most of the morning and was more tedious, than difficult. It was a lot of rolling, folding, and refrigerating.  I followed this recipe provided by the Daring Baker’s challenger and was sure to place a heavy pan on top of the puff pastry while it baked to avoid  the over “puff” that can often happen to the best of bakers!
Next, I made the custard according to the provided  recipe. It was nothing more than your typical custard recipe including milk, cornstarch, egg yolks, sugar, vanilla, and butter, but it was oh so yummy. I was half tempted to ditch the whole napoleon thing and eat the bowl of custard all by myself, but than I thought about all the rolling, folding, and refrigerating and I reluctantly changed my mind.

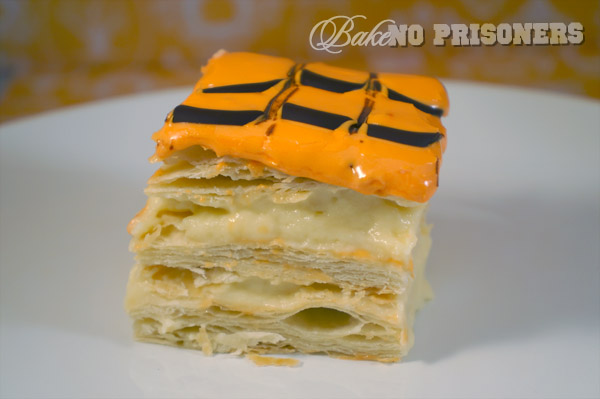
Once assembled, I topped my Napoleon with orange royal icing and dark chocolate to celebrate my favorite holiday!

I am so glad I decided to take on this month’s challenge. If I were dressing up this Halloween, I would be Superwoman, because there is nothing this girl can’t tackle!
The Daring Bakers’ Challenge: Mountain Apple Empanada Gallega

Patri of the blog, Asi Son Los Cosas, was our September 2012 Daring Bakers’ hostess and she decided to tempt us with one of her family’s favorite recipes for Empanadas! We were given two dough recipes to choose from and encouraged to fill our Empanadas as creatively as we wished!

So I decided to take all those mountain fresh apples that the hubster and I picked a few weeks ago, add a little sugar and cinnamon, and make a mountain apple empanada!

I started my empanada dough first, by following this recipe from Asi Son Los Cosas. It is almost fool proof and took me no time at all getting the dough prepared. Once in a lightly oiled bowl, I left the dough alone to rise for about 40-50 minutes and began work on my apple filling.

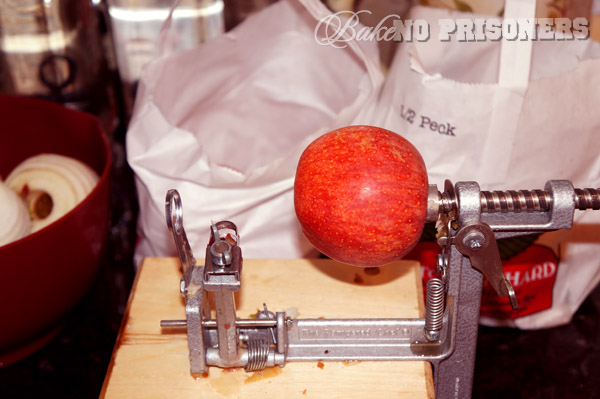
I cored and peeled 6-8 apples with my handy dandy apple peeler. It is one of those hand crank, older-than-dirt peelers attached to a wooden board, but it just so happens to be one of my favorite kitchen gadgets. I think it’s because it makes me feel like I am in an old world time period, let’s say circa 1930′s, wearing a white, frilly apron with heels and listening to some big band orchestra in the background while baking Mama’s homemade apple pies.

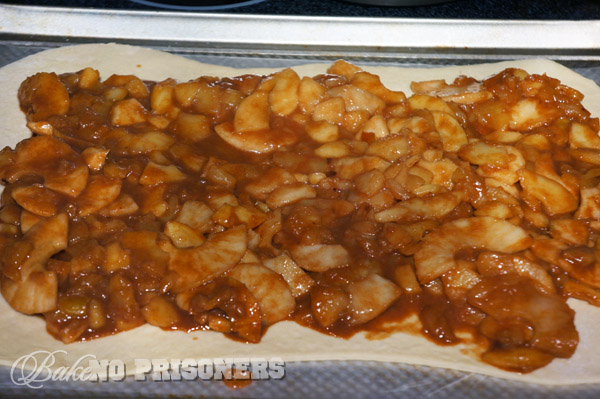
Once my apples were sliced and diced, I added a 1/2 cup to 3/4 cup of sugar and 1 1/2 tablespoons of cinnamon.  I let them simmer on the stove for about 10 minutes until the apples began to soften. I then removed my apple mixture from the stove and let it cool while I rolled out my empanada.

On a lightly floured surface, I cut my dough in half and rolled out one half in a long rectangle. I then added my cooled apple mixture.  After taking a closer look at this photo, I noticed my apple slices are a few different size. Part of that is because of the breakdown of the apples due to the heat from the stove, but I would recommend you try and keep your slices the same size to ensure that they cook at the same rate.

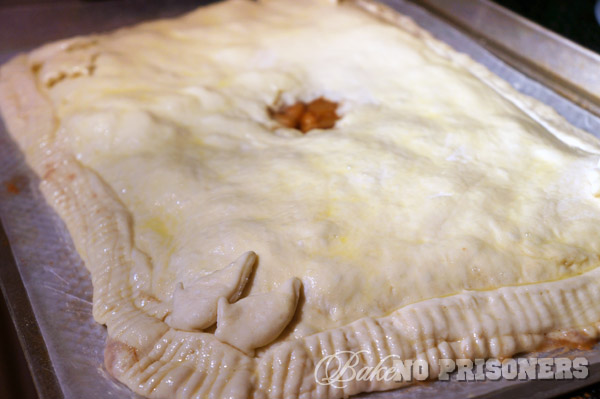
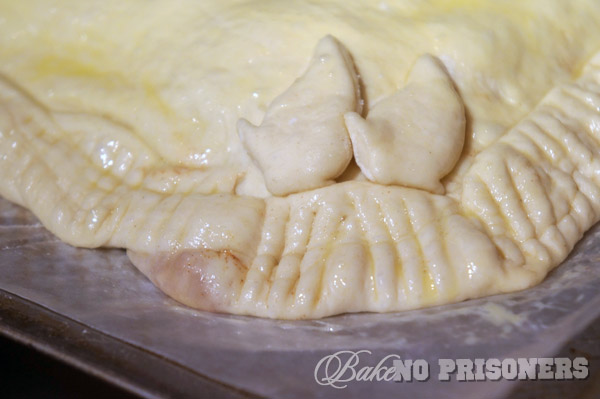
The apple empanada is very similar to making an apple pie only your using empanada dough instead of a pie crust. So to top your empanada, take your other half of dough and roll that out in a long rectangle. You will have to make sure it is a bit smaller than your bottom rectangle because it only has to cover the filling. I chose to seal the bottom rectangle to the top with fork marks, so that looked like an apple pie.  You also have to make a 1 1/2 -2 in. hole in the middle to allow hot air to escape.

I also used my extra dough to make little leaves to border my forked crust.

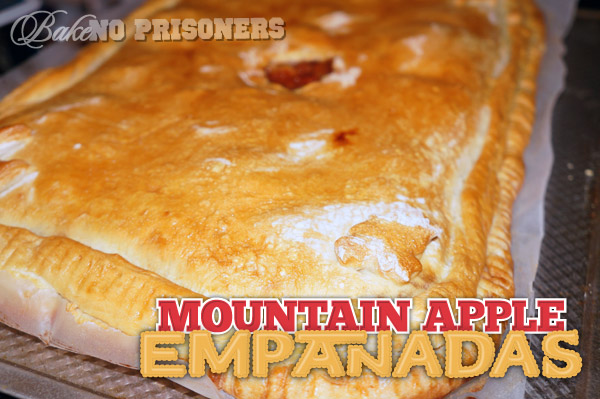
After a quick egg wash, I baked my empanada for 45 minutes at 350 degrees.

Final note: This post makes me think of my Mom, who is on a 31 day Mediterranean cruise with her friends and is currently in Barcelona, Spain. I hope that while you are in Spain you have a true empanada for me, Mom. xoxo

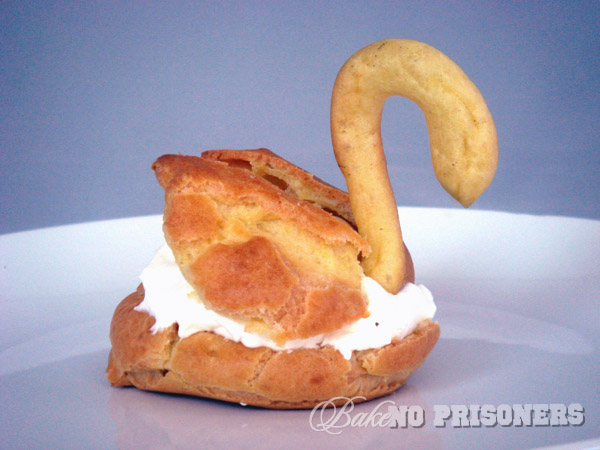
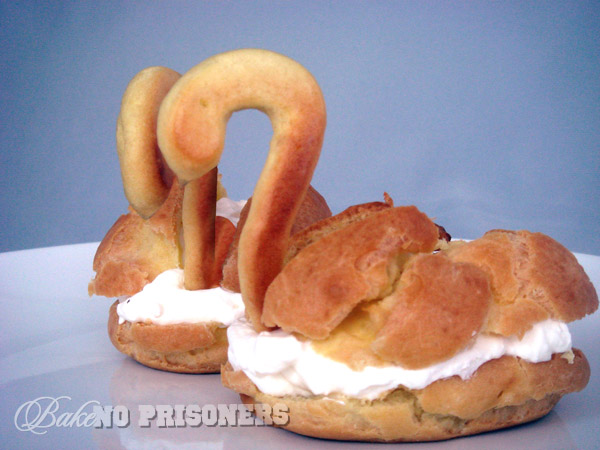
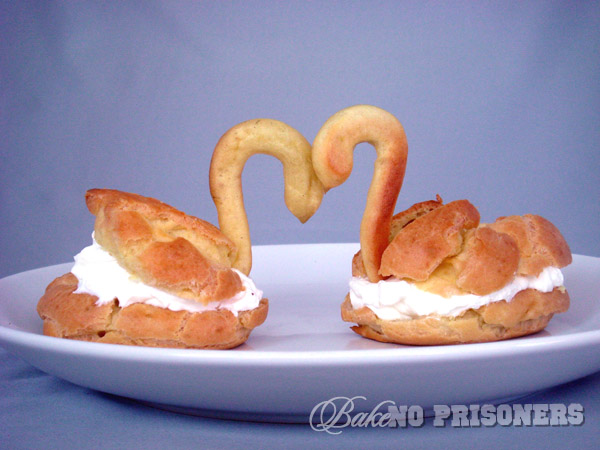
The Daring Bakers’ Challenge: Filled Pate a Choux Swans

Pate a Choux, or in our house, Pikachu to be nerdy, has proven to be quite the Daring Bakers’ Challenge this month. Over a month’s time, I have tried to make Pate a Choux 7 times, using 28 eggs, 42 tablespoons of butter, 7 cups of flour, and 7 tablespoons of sugar and salt. In its simplest form, Pate a Choux is nothing more than the pastry dough that makes up an eclair. It is just a few eggs, several tablespoons of butter, a cup of flour, and a little sugar and salt. Sounds like a breeze, right? Wrong! Nothing could be further from the truth! Do not let the short ingredient list fool you! This recipe challenge is not for the faint of heart! In my opinion, it is the devil incarnate! But, I digress…

The first 3-4 times were a complete disaster! (OK, so I thought I was done with my rant…apparently not) The dough never solidified, thus I had to begin again and again. After trying a different recipe, I finally had some success with the dough forming in the pan, allowing me to add the eggs, and fill the pastry bag. The swan heads came fairly easy, but I piped the bodies too flat. Once out of the oven, the heads again were perfect. They were puffed and golden brown, but the bodies weren’t done and what puff they had, quickly deflated.

The 6th time I tried, I had perfected the dough and getting it into the oven was a breeze, but, (yes, there is a big BUT),  I had dripped something onto the oven floor prior to their arrival, thus smoking out my poor Pate a Choux swans. They were not blog worthy, so I began again, again.

The 7th and final go round with my Pikachu was a complete success! The dough formed nicely in the pan, the eggs were added, the swans were piped, and all were puffed and golden. Once cooled, I sliced the swan bodies in half and sliced the top half to make the wings. I then added Chantilly cream (which was the easiest part of the entire process!) to the bottom half, added the head carefully(which I wanted to rip off at this point), and placed the wings neatly on top.

When it comes to this challenge (or my life for that matter) I am not sure whether I would call myself stubborn and hard headed or determined and steadfast, but the ladder sounds better to me, so I will go with that. For anyone attempting Pate a Choux, I recommend a bakery!

Kat of The Bobwhites was our August 2012 Daring Baker hostess who inspired us to have fun in creating pate a choux shapes, filled with crème patisserie or Chantilly cream. We were encouraged to create swans or any shape we wanted and to go crazy with filling flavors allowing our creativity to go wild!

Here is the challenge in its entirety!


The Daring Baker’s Challenge: Crazy for Crackers

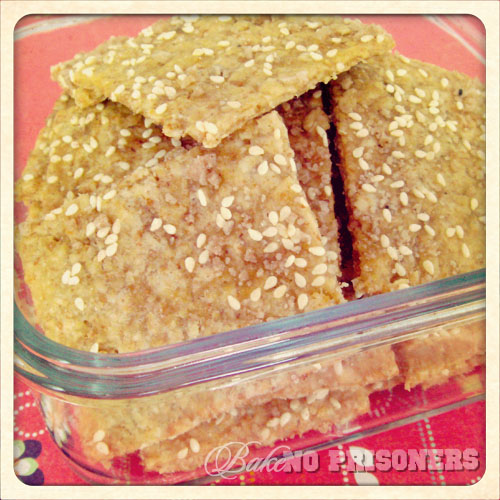
Our July 2012 Daring Bakers’ Host was Dana McFarland and she challenged us to make homemade crackers! Dana showed us some techniques for making crackers and encouraged to use our creativity to make each cracker our own by using ingredients we love.

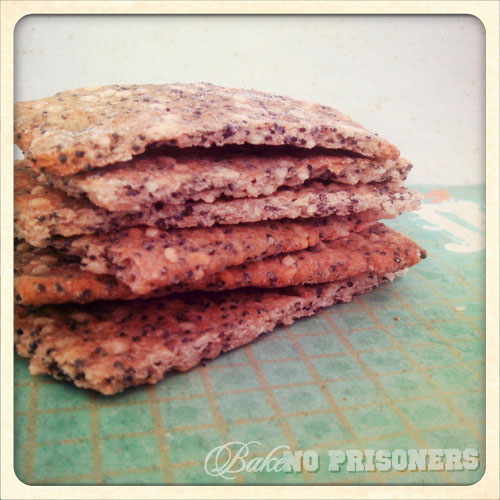
So the challenge was to create two types of crackers using two of three methods: hand rolled, pasta machine rolled, or the icebox method. I choose to hand roll the Health Crackers and use my hand cranking pasta machine for the Seedy Crisps.
I’ve made Barefoot Contessa’s Parmesan crackers before, but this was something new for me. I found the poppy seeds and the sesame seeds at a new, local spice shop in Birkdale called Savory Spice Shop. They have everything from vanilla bean paste to Asafetida (this spice mimics the taste of onions, but is not made from onions…perfect spice for the hubster’s allergy to onions). These were the perfect little snack to sit at home with and nom during happy hour with some wine and cheese.

Health Crackers (Roll these by hand):

Servings: Approximately 80 crackers

Ingredients:

3 cups (720 ml) (240 gm)(8½ oz) rolled oats
2 cups (480 ml) (280 gm/10 oz) plain (all-purpose) flour
1 cup (240 ml) (80 gm) (2¾ oz) wheat germ
3 tablespoons (45 ml) (40 gm)(1½ oz) sugar
1 teaspoon (5 ml) (6 gm) salt
¾ cup (180 ml) vegetable oil
1 cup (240 ml) water
1 large egg white
Cracker topping:
Sesame seeds, poppy seeds, nigella (onion) seeds, salt
Salt sprinkling

Directions:

1. Mix the oats, flour, wheat germ sugar and salt together in a large bowl or bowl for the standup mixer.
2. Combine the water and oil and stir into the oat mixture until it comes together and a dough forms.

3. Form dough into a disk and allow to rest in the fridge for about 20 minutes but up to a day if you are making the ahead.
4. Preheat the oven to moderate 325°F/160°C/gas mark 3.
5. Divide the dough into quarters and work with one piece at a time, allowing the remaining pieces to stay in the fridge as you proceed with rolling out the crackers.
6. On a lightly floured surface, roll the dough to about 1/16 inch (1½ mm) thick and transfer to a parchment lined baking sheet by carefully wrapping the dough around the rolling pin.

7. Brush the dough with the egg white mixed briefly with a tablespoon of water and sprinkle with seeds and salt of your choice.
8. Cut the dough with a pizza wheel and bake for 25-30 minutes until browned. Crackers that are not crispy once cooled may be returned to the oven.
9. Store in an airtight container and eat within two weeks.

Seedy Crisps (Roll with pasta rollers or by hand):

Servings: Varies depending on thickness; approximately 50 crackers

Ingredients:

1 cup (240 ml) (140 gm/5 oz) whole wheat four
1 cup (240 ml) 140 gm/5 oz) all-purpose (plain) flour
1/3 cup (80 ml) (50 gm) (1¾ oz)poppy seeds
1/3 cup (80 ml) (40 gm) (1¼ oz) sesame seeds
1½ teaspoons (7½ ml) (9 gm) table salt
1½ teaspoons (7½ ml) (8 gm) baking powder
3 tablespoons (45 ml) olive oil
¾ cup plus 1 tablespoon (195 ml) (6½ fl oz) water

Directions:

1. Mix the flours, seeds, salt and baking powder in a large bowl.
2. Add the oil and stir until combined.
3. Add the water until the dough comes together.
4. Kneed the dough 5 or 6 times and allow to rest, covered, on the counter for 15 minutes. You can also chill the dough at this point and come back later.

5. Preheat the oven to hot 450°F/230°C/gas mark 8.
6. Working with a quarter of the dough at a time, either use a rolling pin to reach a desired thickness (thick or thin) or roll out in your pasta rollers. If you use pasta rollers, ensure the dough is well-floured so as not to stick.

7. Place strips of dough on a sheet pan lined with parchment.

8. If the crackers are thick, bake for 7minutes, flip them over and bake for 7 minutes more. Then cut or break into crackers shapes while still warm. Return to the oven for a further 5 minutes until crispy.
9. If not crispy enough when cooled, crackers can be returned to the oven.
10. Store in an airtight container and eat within 2 weeks.